We’re in the home stretch now.
With my new set of Progress coilovers freshly assembled, and the rest of the new suspension components already installed, I had the comparatively easy task of installing the coilovers in the car. I think this is the kind of job that makes people say Hondas are easy to work on – at least when the parts are no longer rusted together.
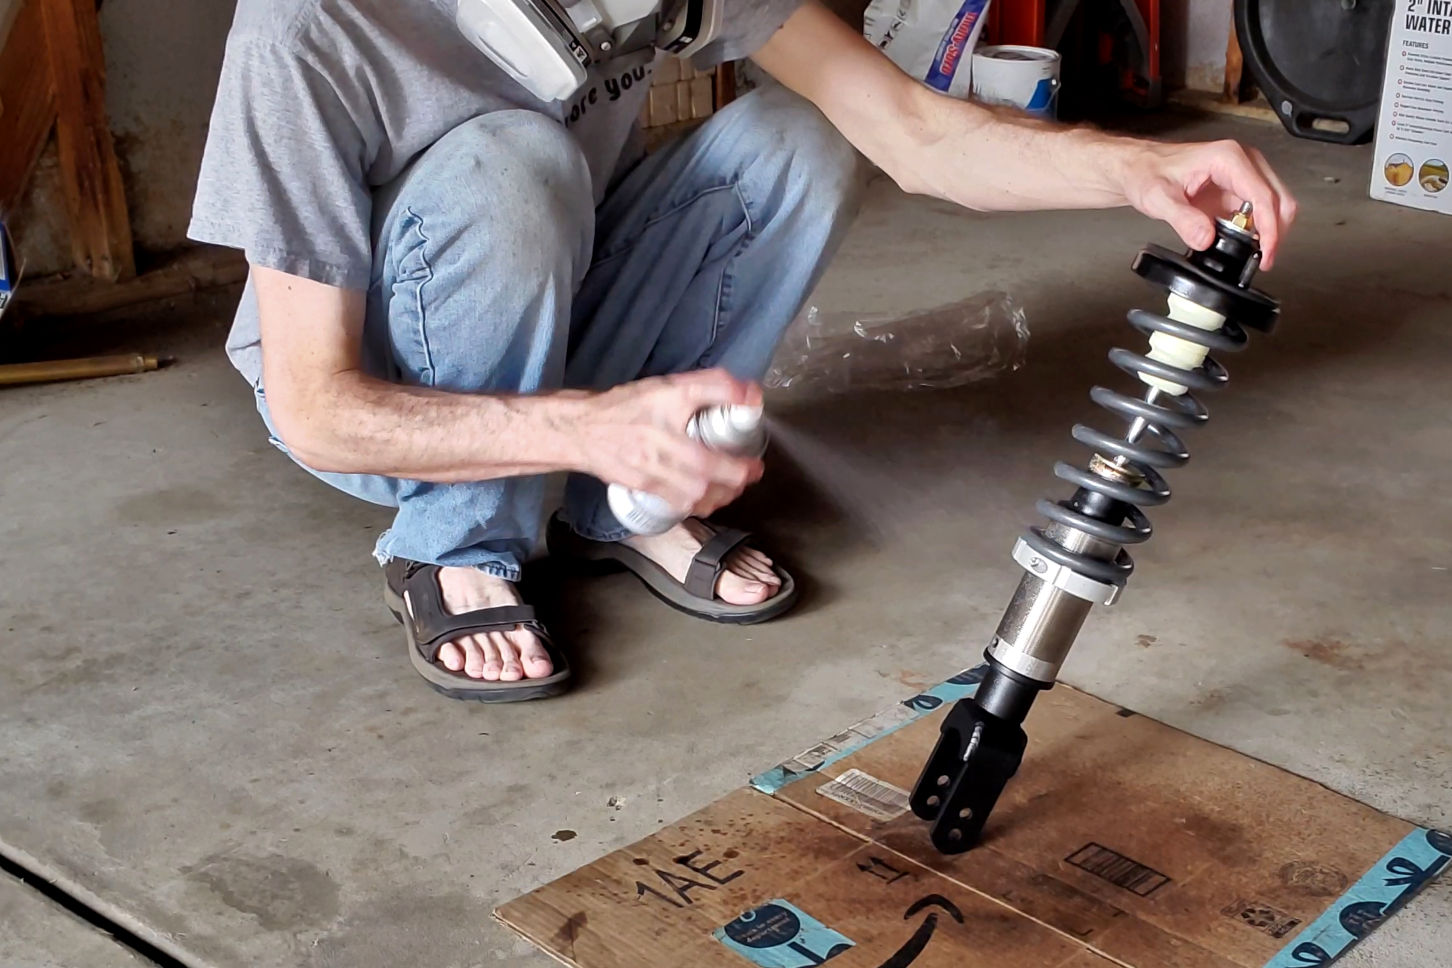
First, a little prep work: Progress recommends spraying their coilovers with a protective coating of Boeshield T-9. This is a clear spray developed by Boeing that should keep the elements out and prevent any corrosion. I picked up a can at my local boating supplier.
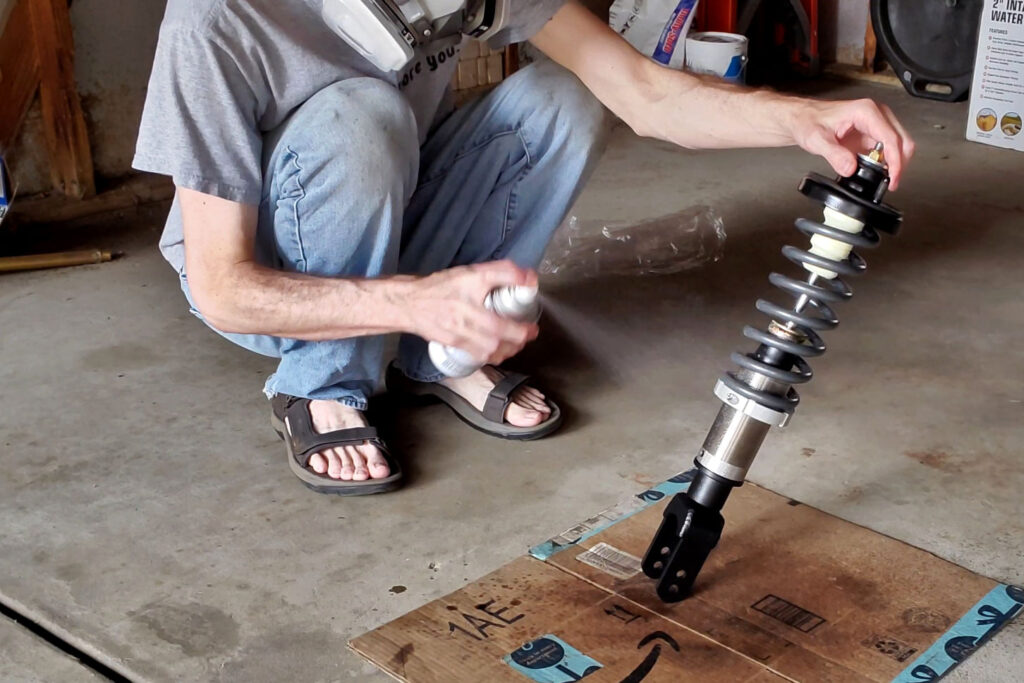
After spraying, I left it to dry for a while before handling the coilovers any further.
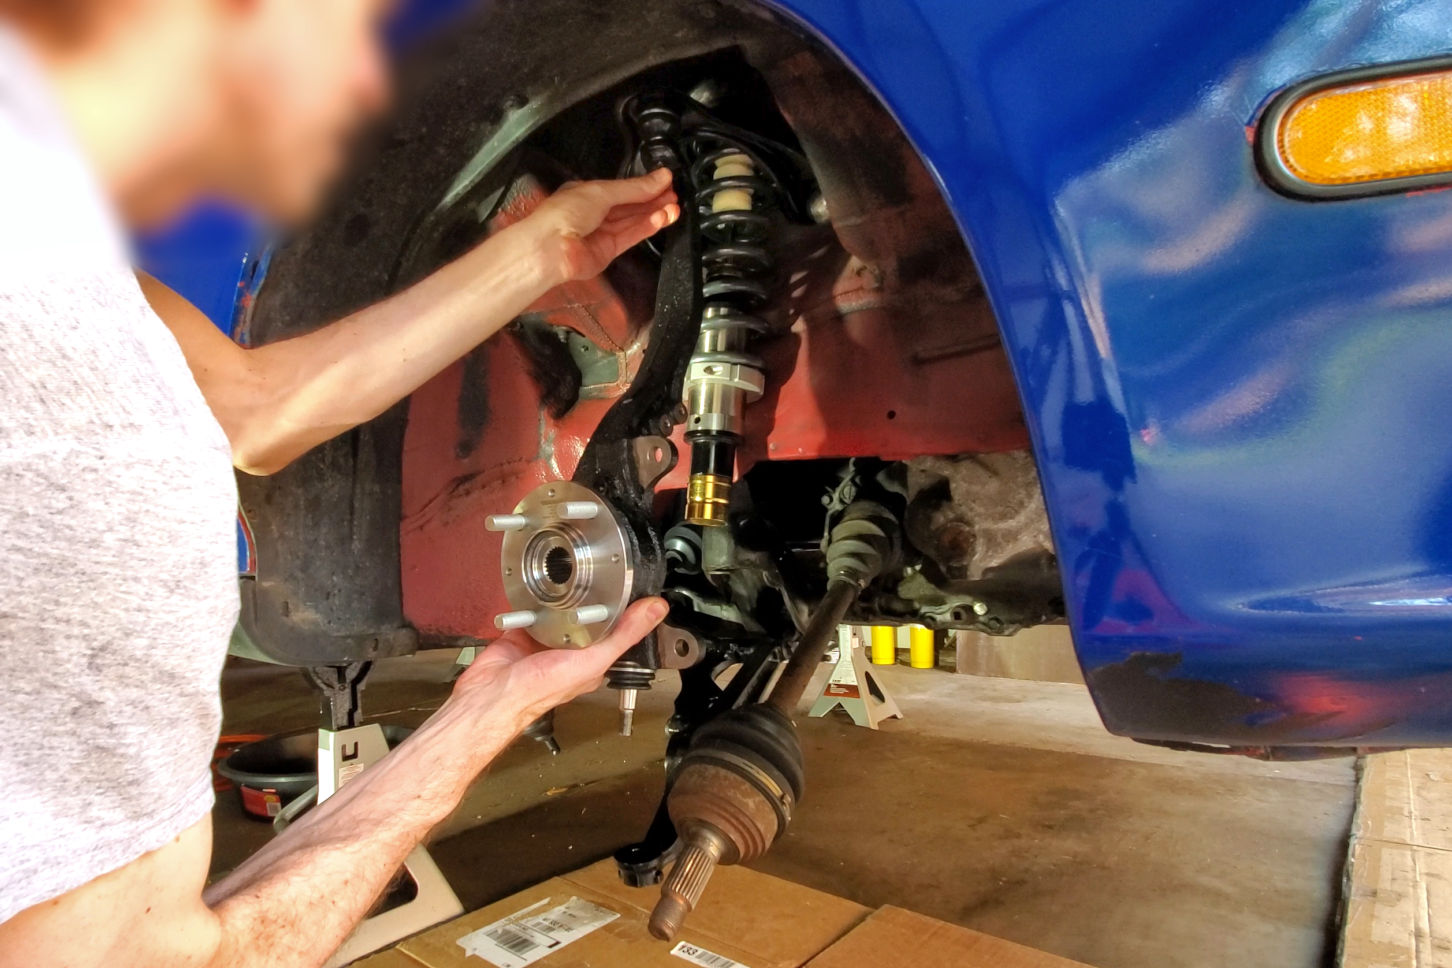
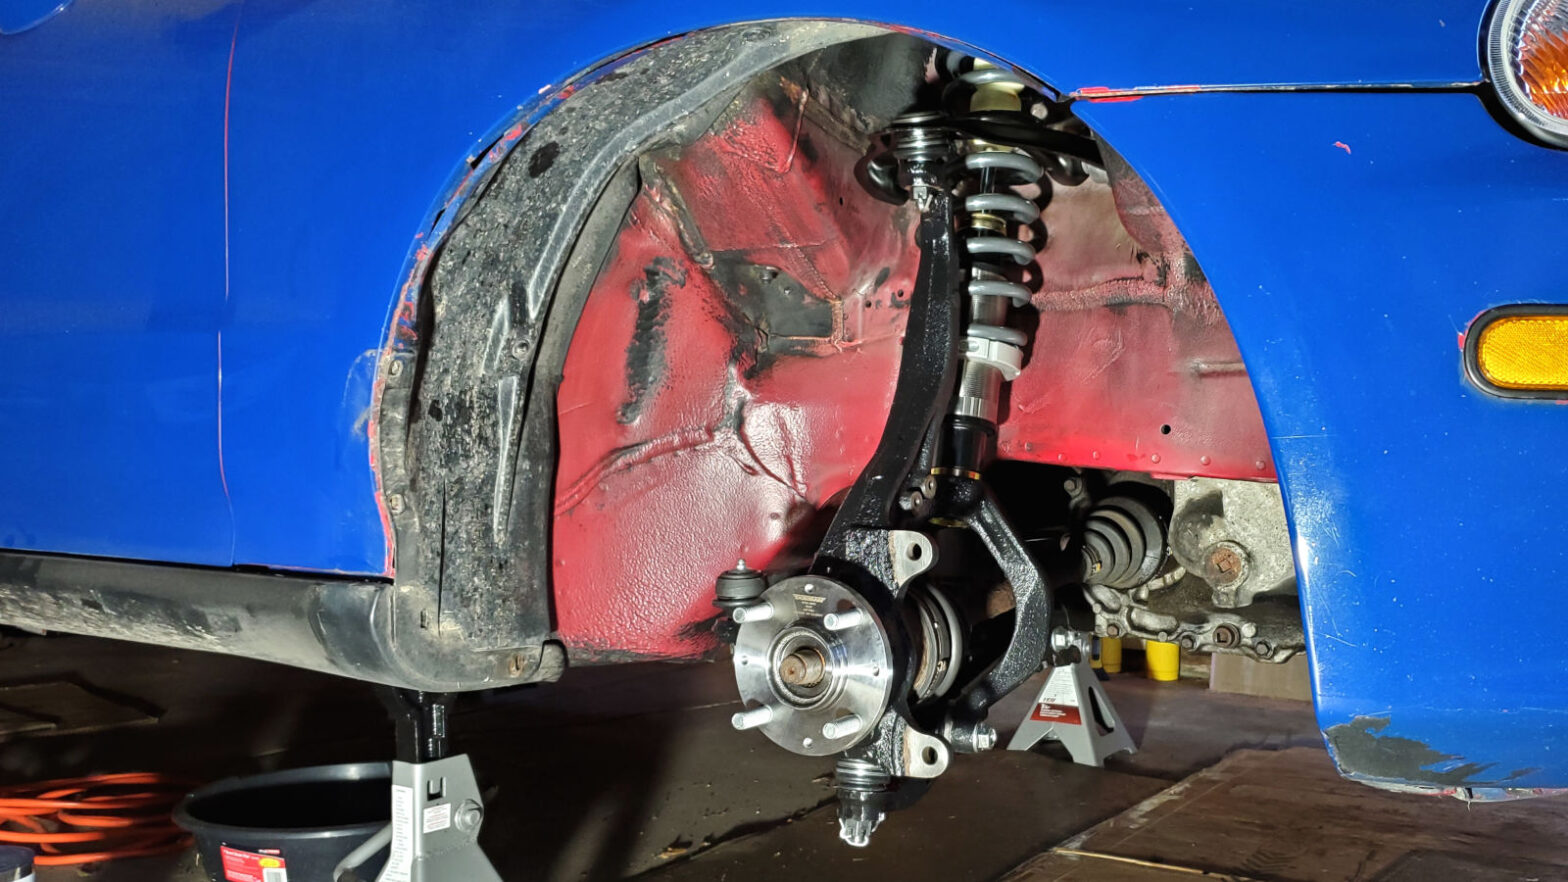
Installing the Rear Coilovers
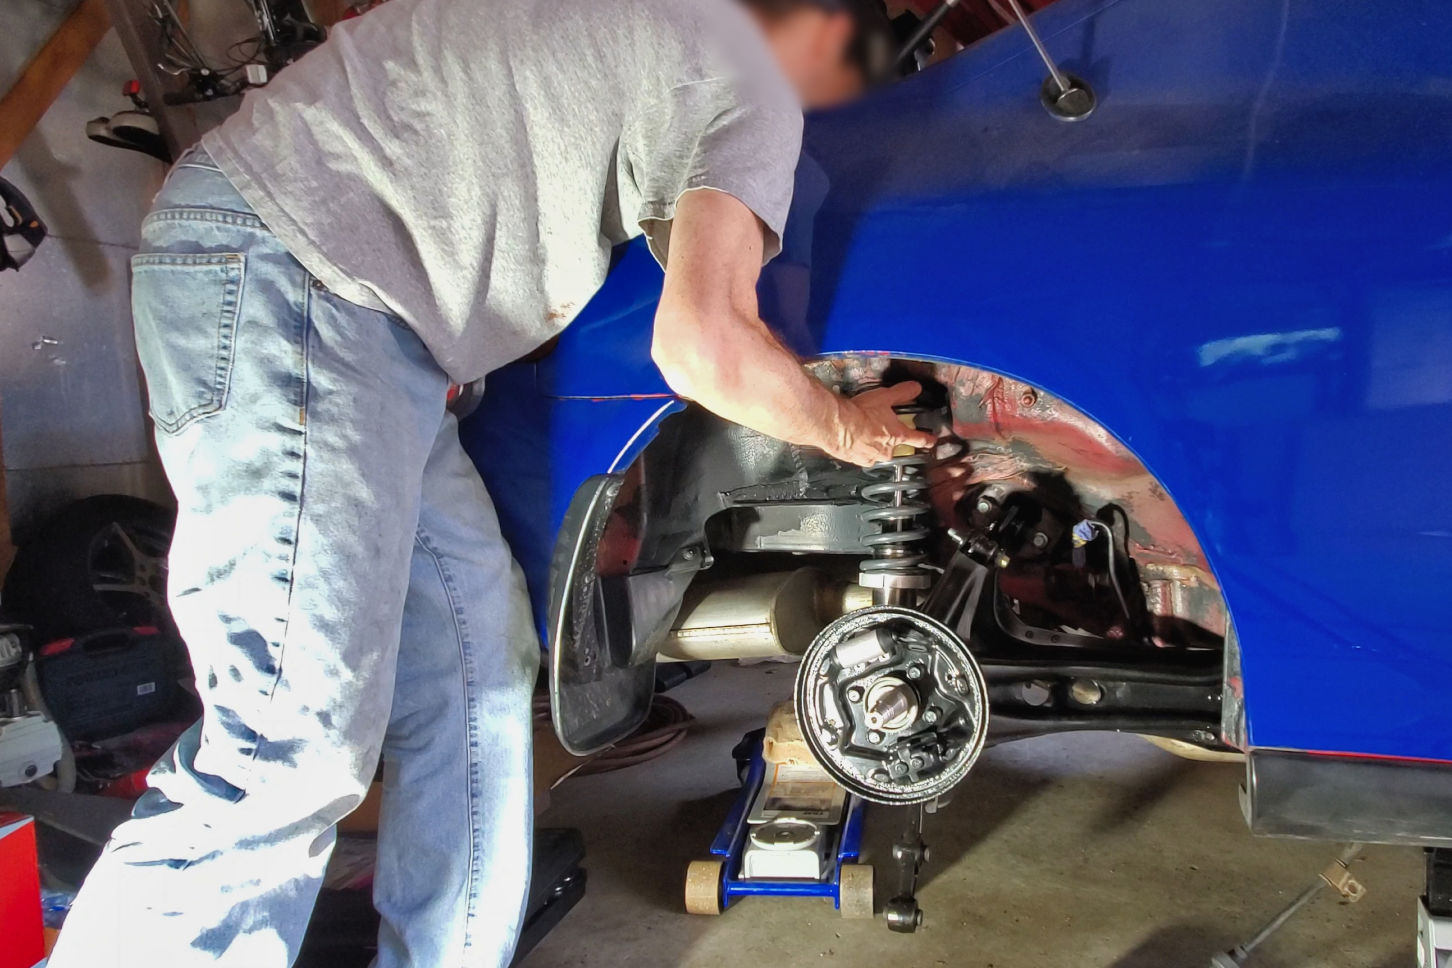
Once that coating was dry, I hoisted the rear coilover into place and threaded a nut on top to support it. Fortunately, the del Sol is a small car and accessing the top of the shock mount is easy.
I came up with a sequence for installing the lower control arm that leaves enough flexibility to line the bolts up more easily. After installing the inboard bolt, it’s much easier to install the outboard one in the trailing arm before installing the one in the bottom of the shock.
Slip the outer bolt in the trailing arm first.

The trailing arm can be rocked up and down to more easily align the bolt holes in the shock.
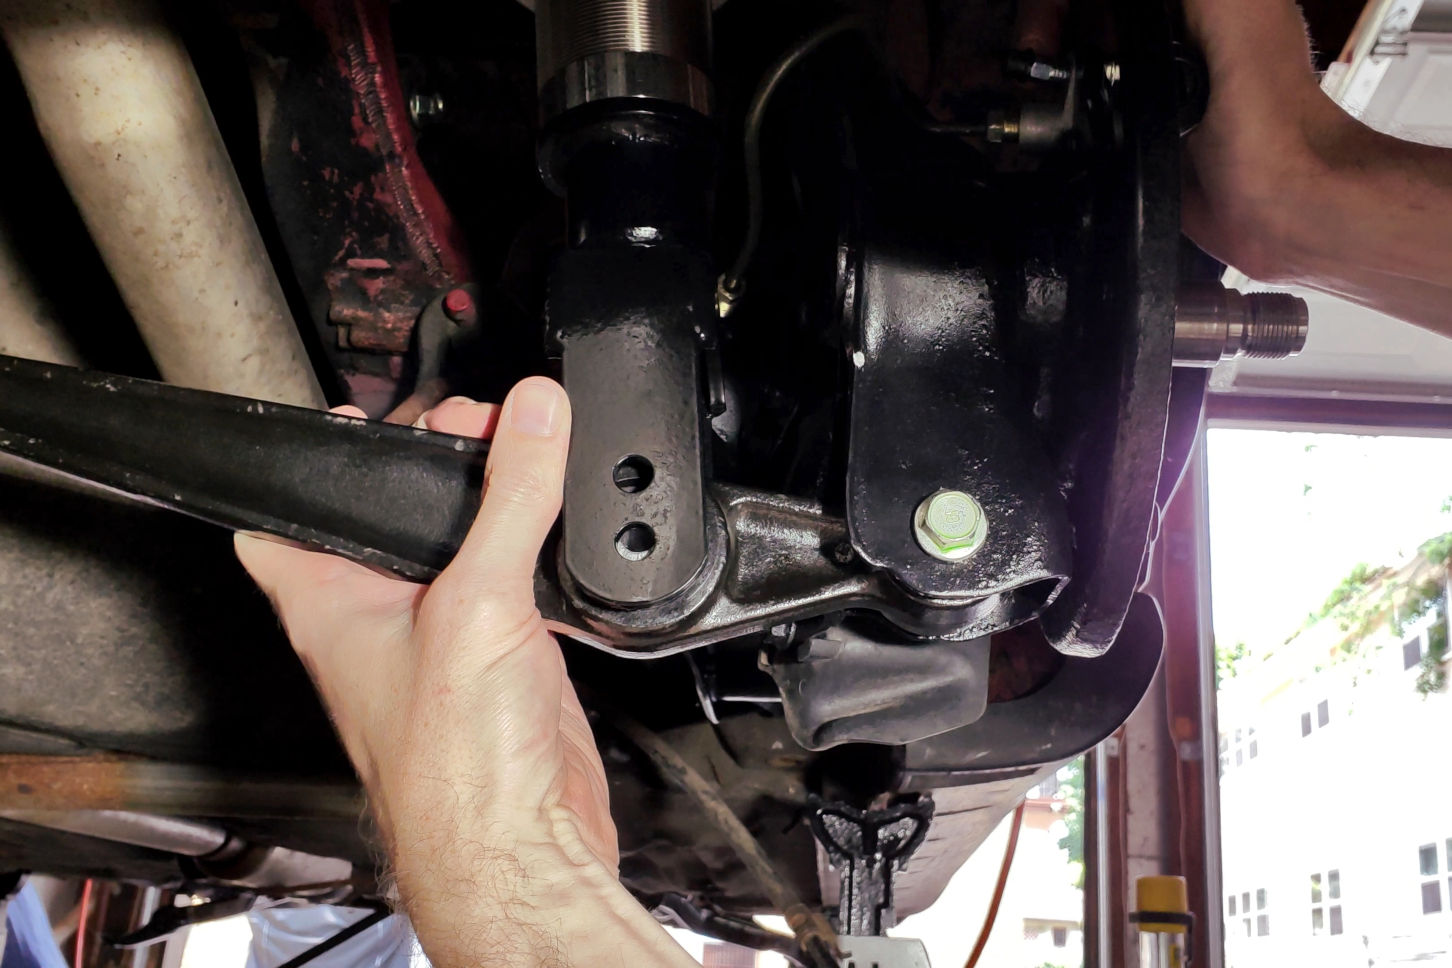
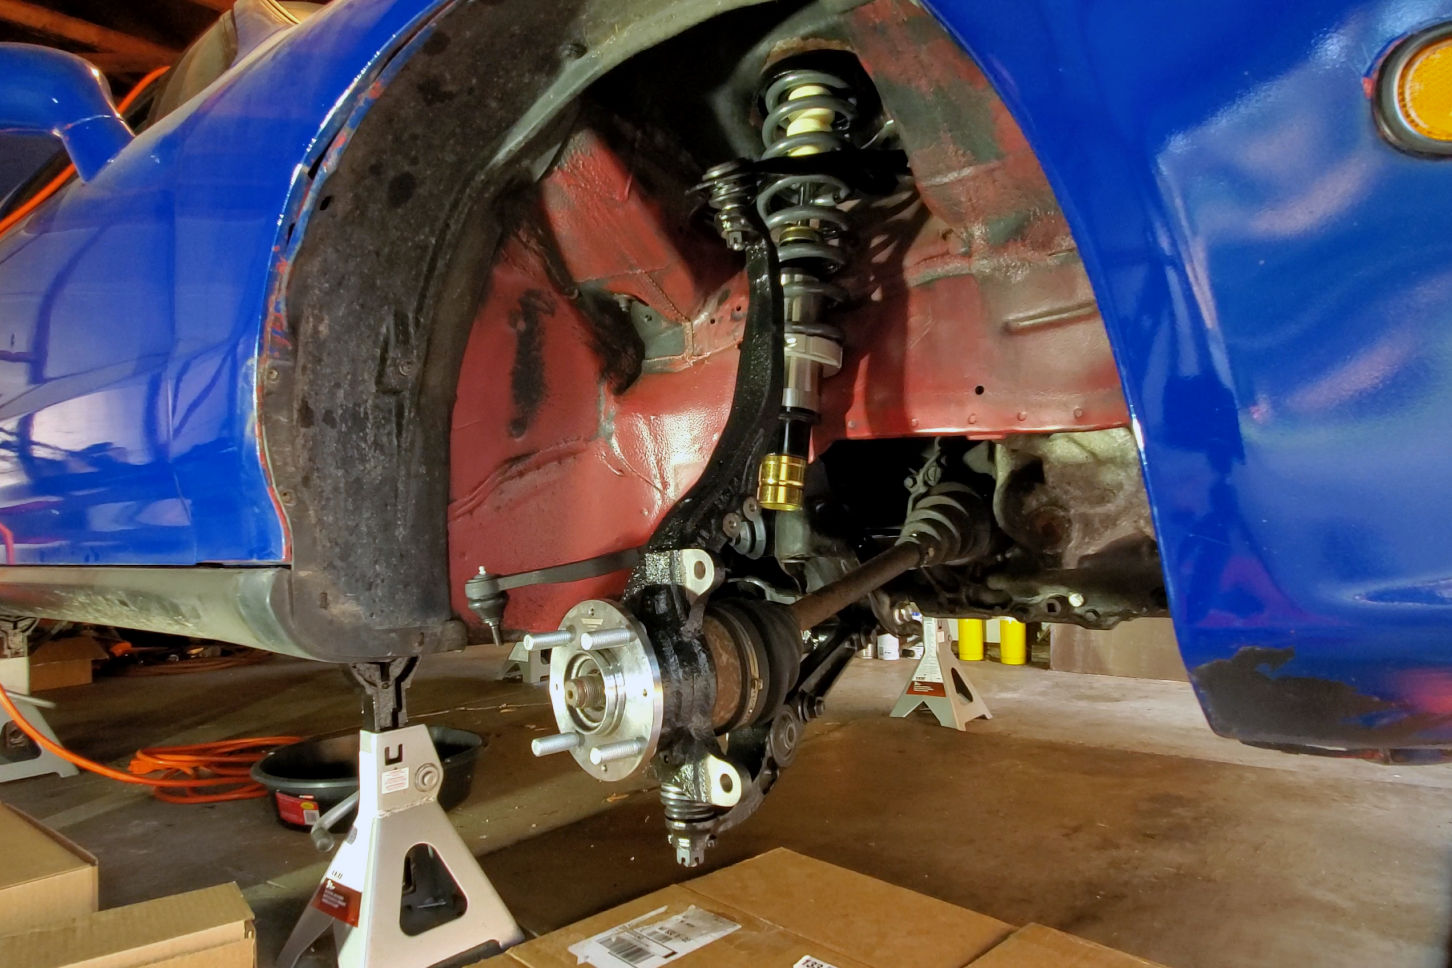
The Progress kit comes with the hardware for the fork, which uses a nut and bolt combo.
You may notice the two holes in the fork on the bottom of the shock. I initially went with the lower position, which I assume is the intended choice for this car. However, I later switched to the upper hole because I noticed that the spring was fully extending and getting loose when the suspension was at full droop. Using the upper hole isn’t ideal, as the suspension doesn’t have much droop, but the spring going loose isn’t ideal either. I guess it’s just a limitation of this kit on this car.
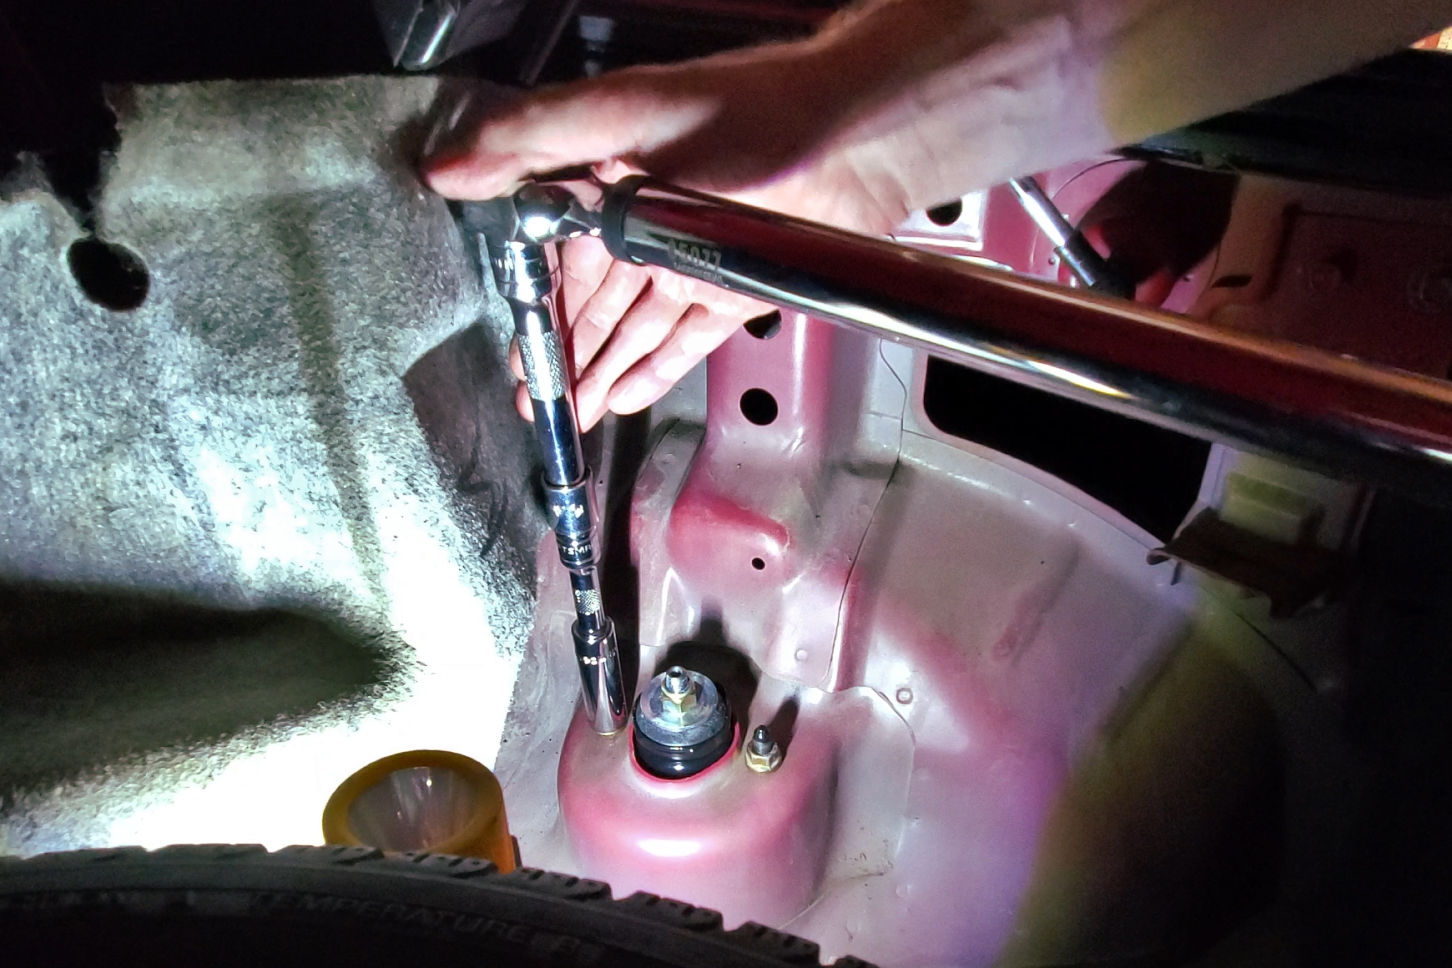
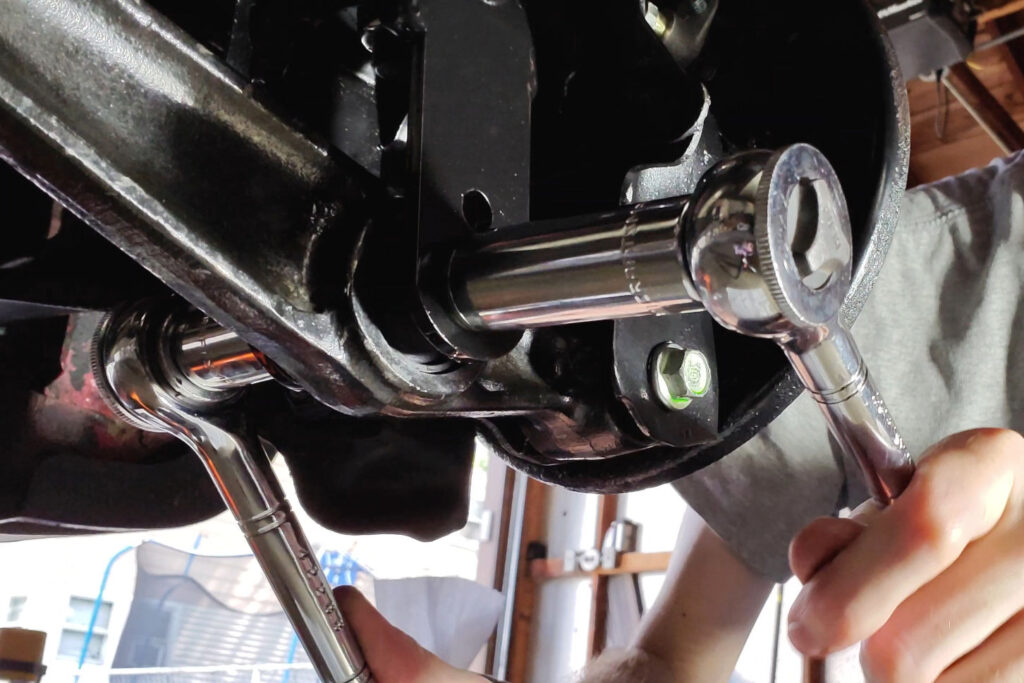
To get the upper nuts torqued, I had to use a combination of adapters and extensions on my torque wrench. This was necessitated by the fact that I had filled the trunk with spare tires as dead weight, as a safety precaution when removing the trailing arms. They weigh a significant amount, and removing them can change the weight distribution of the car enough that there’s a risk, however small, of the car becoming unbalanced on the jack stands.

Extension hell. Hey, as long as it’s in line with the head of the torque wrench, the torque will read correctly.
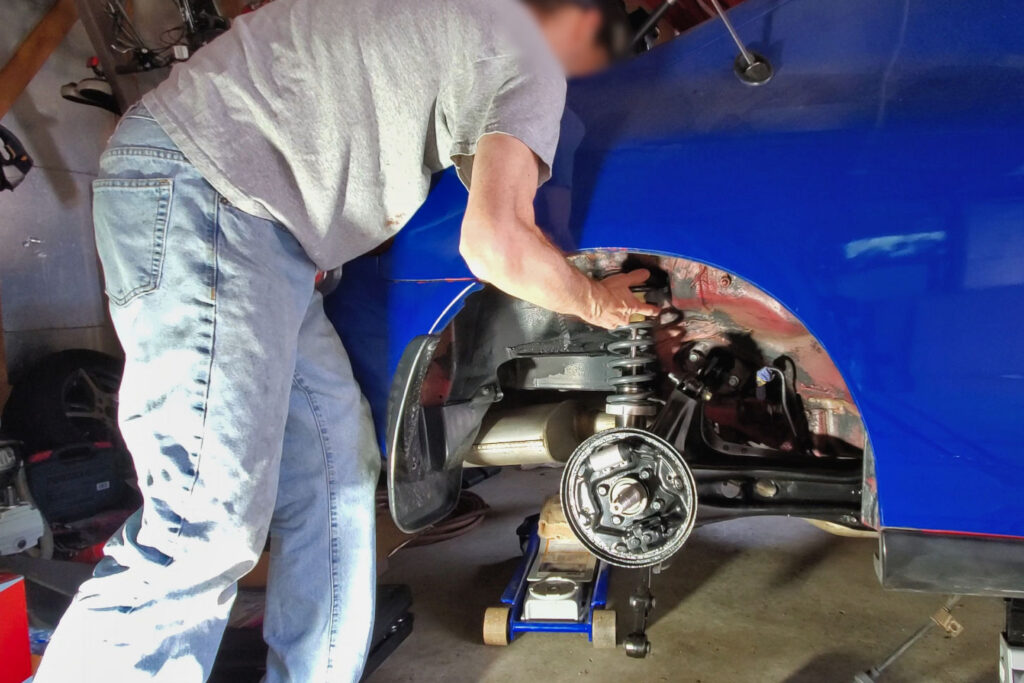
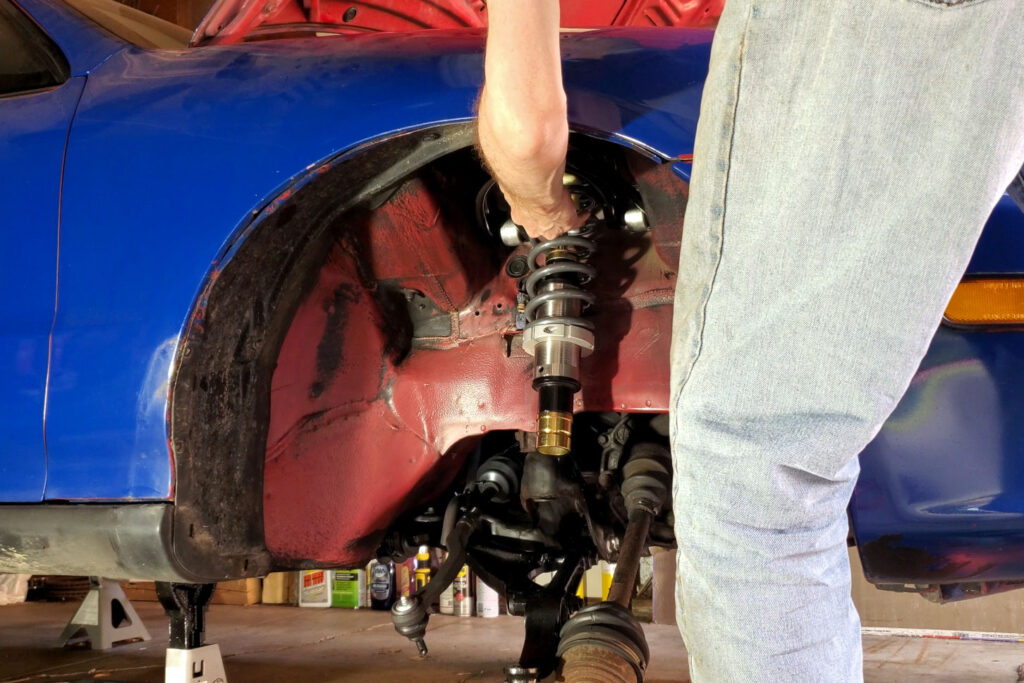
Installing the Front Coilovers
Similar to the rear, I lifted the front coilover up through the upper control arm and got some nuts on the top, finger tight.
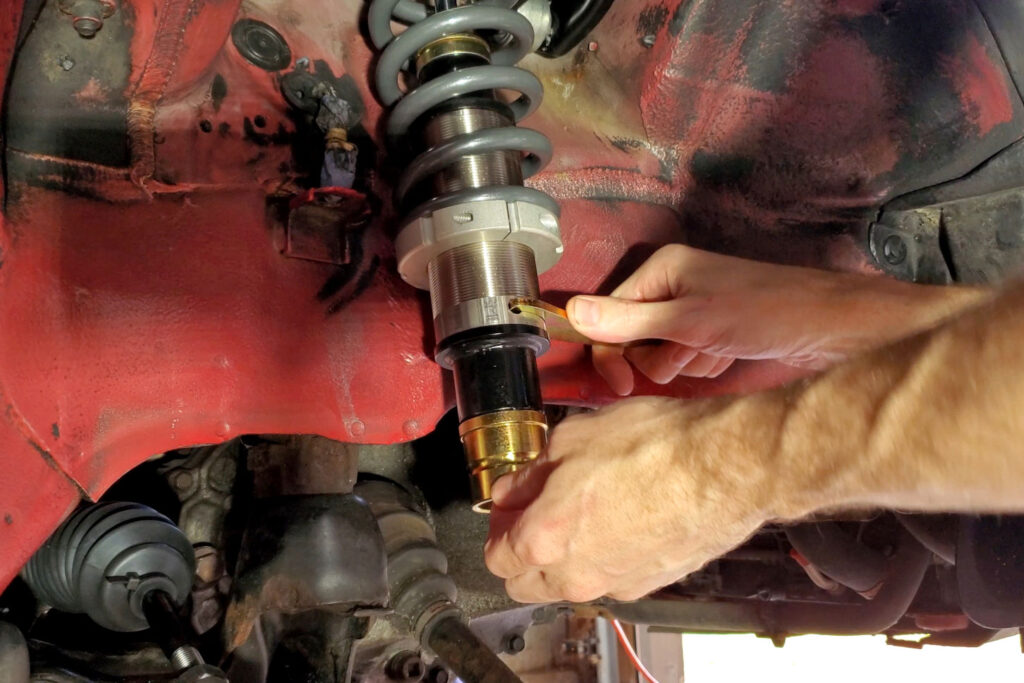
Progress uses a different system than other manufacturers for holding the coilover body in place while rotating the spring perch. There’s a hole in the threaded body for one of the wrenches, so just in case I couldn’t move it later, I lined it up where I thought it would be most accessible. I’m pretty sure you can move it whenever though.
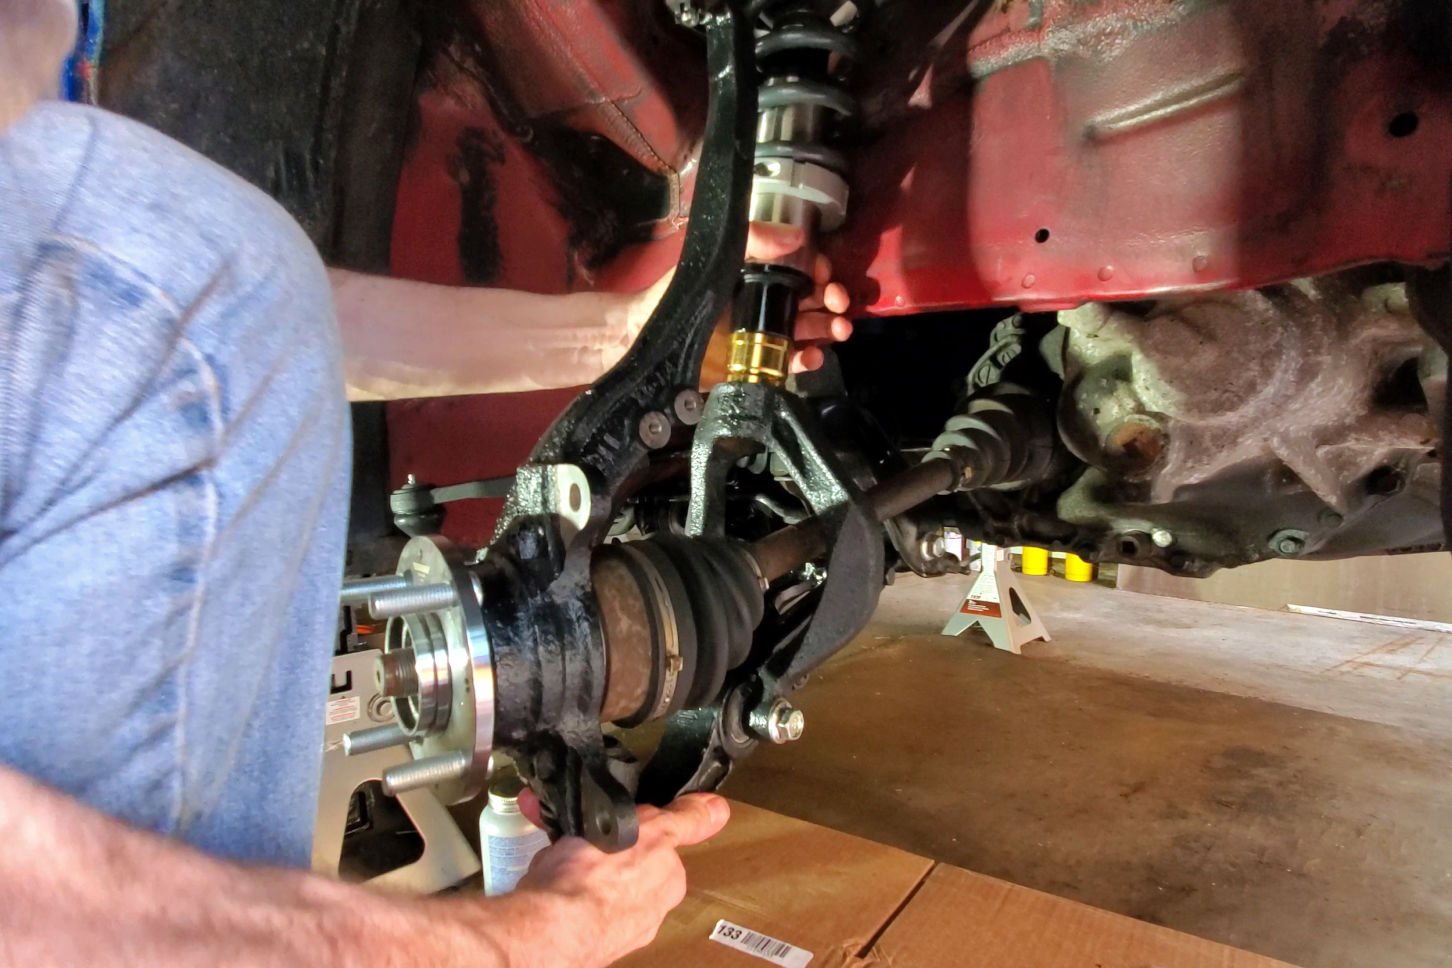
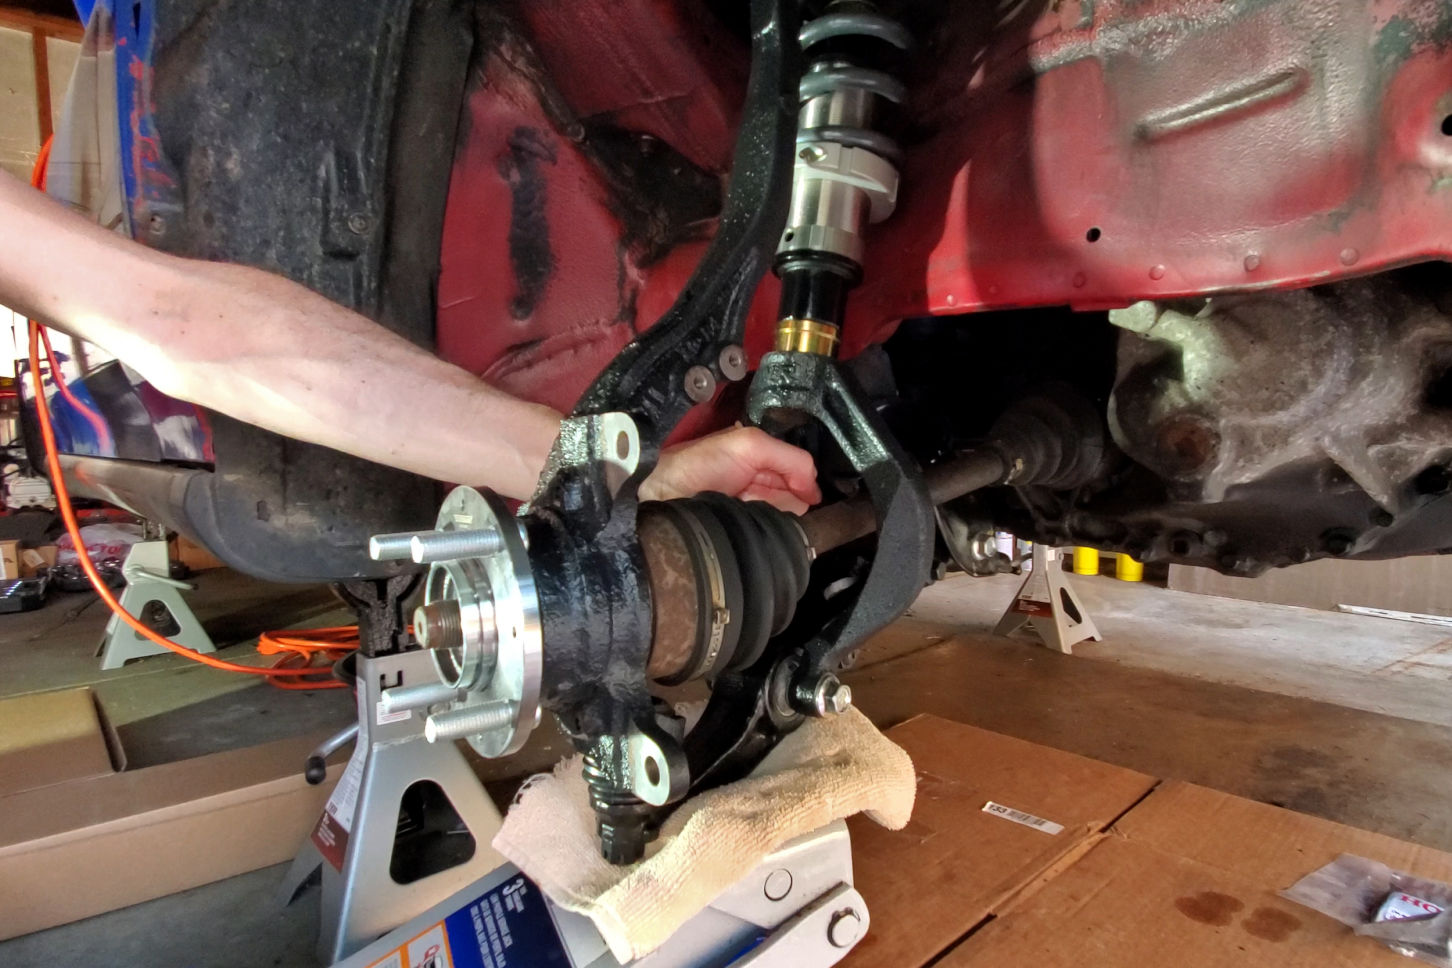
After a failed attempt going in with the lower ball joint first, I discovered that hanging the knuckle from the upper ball joint is the easiest way to install it.

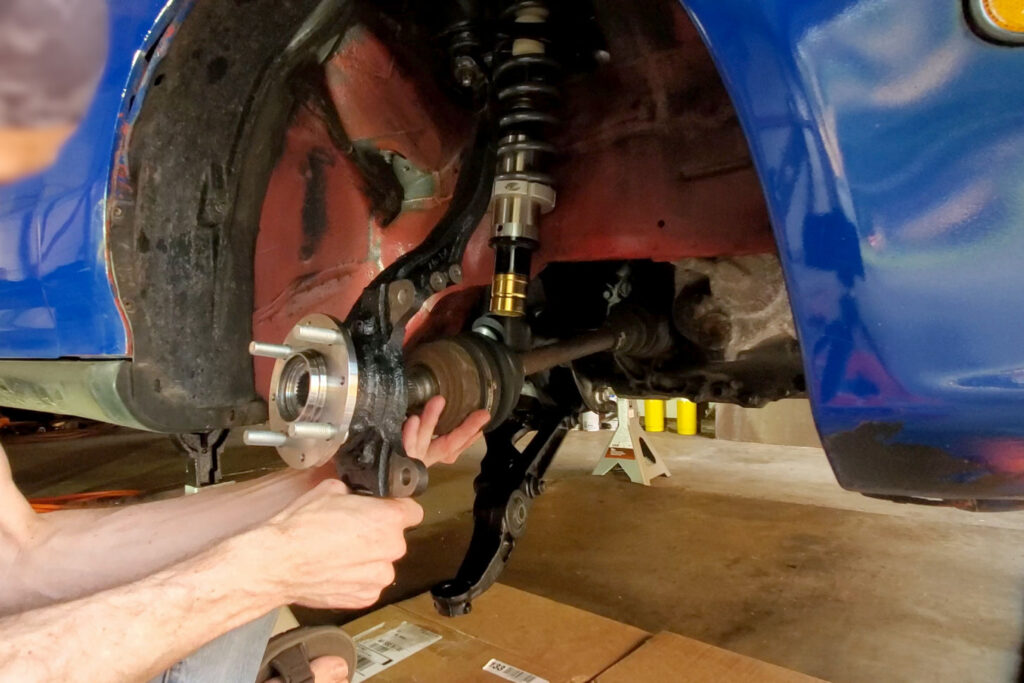
It’s easy to swing the knuckle out to install the splined shaft of the axle.
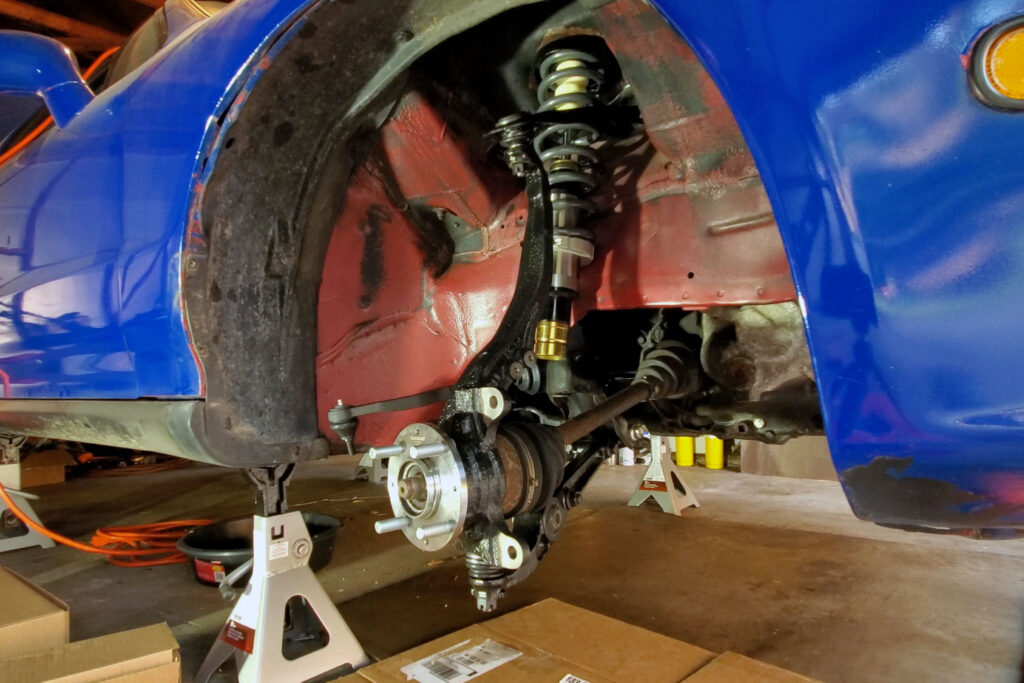
Finally, drop the lower ball joint into the control arm.
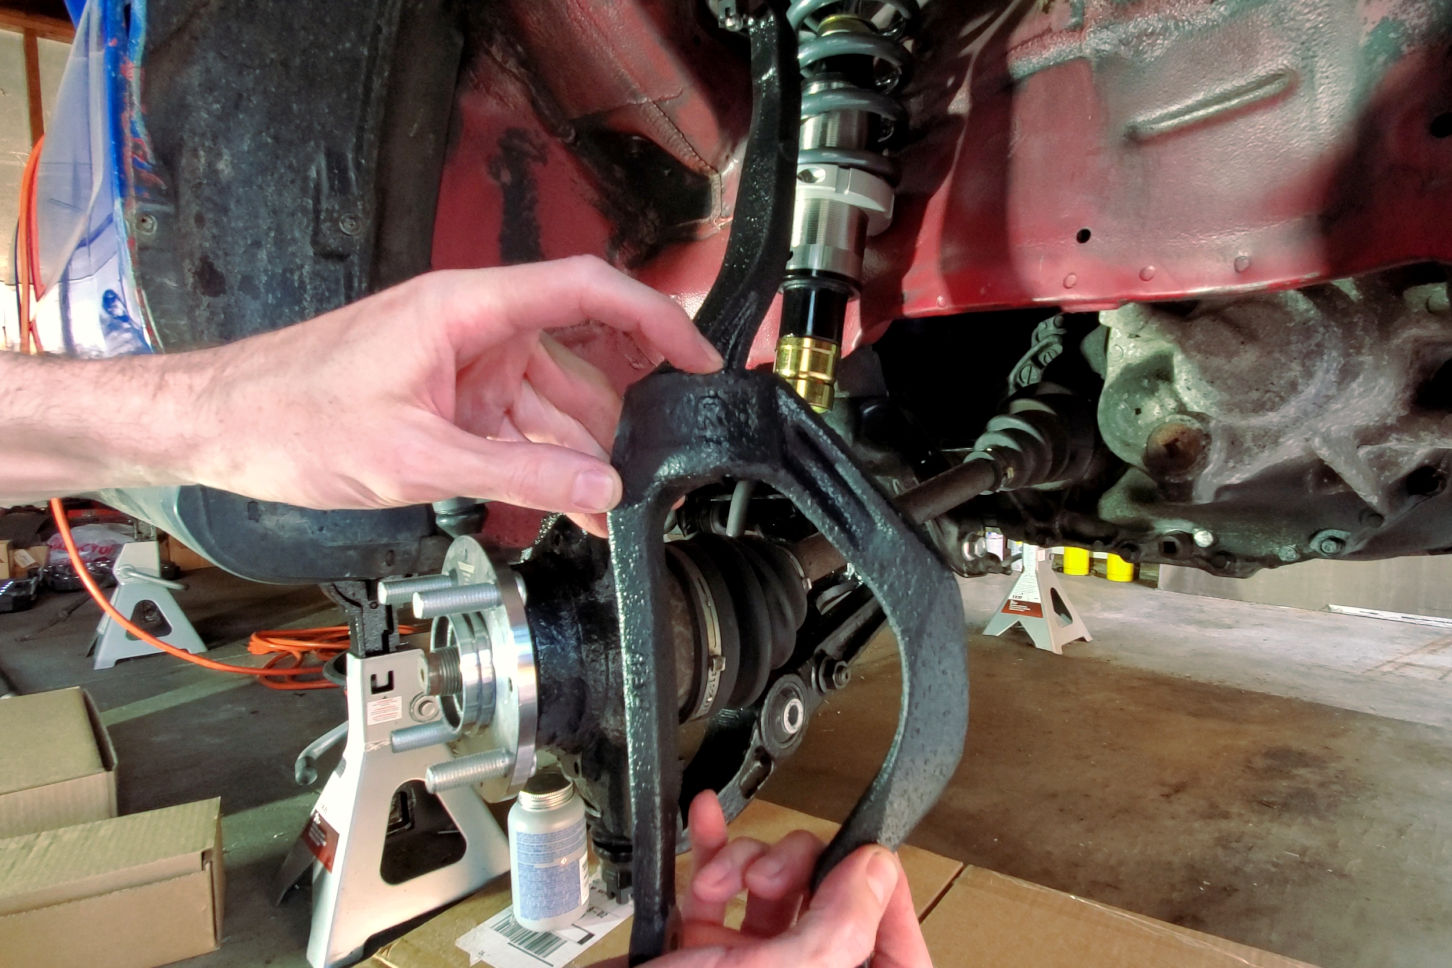
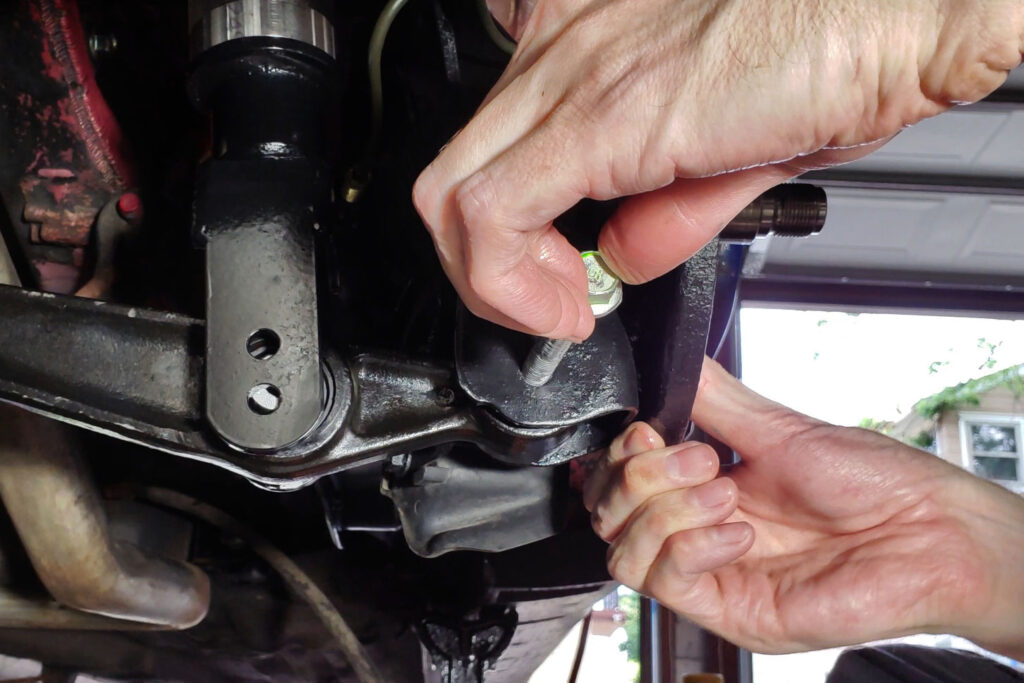
The most finicky part of this installation is the damper fork. Getting the bolt through the lower holes and the control arm bushing can be tricky, and then you have to get the fork to line up with the bottom of the damper and slip into place.
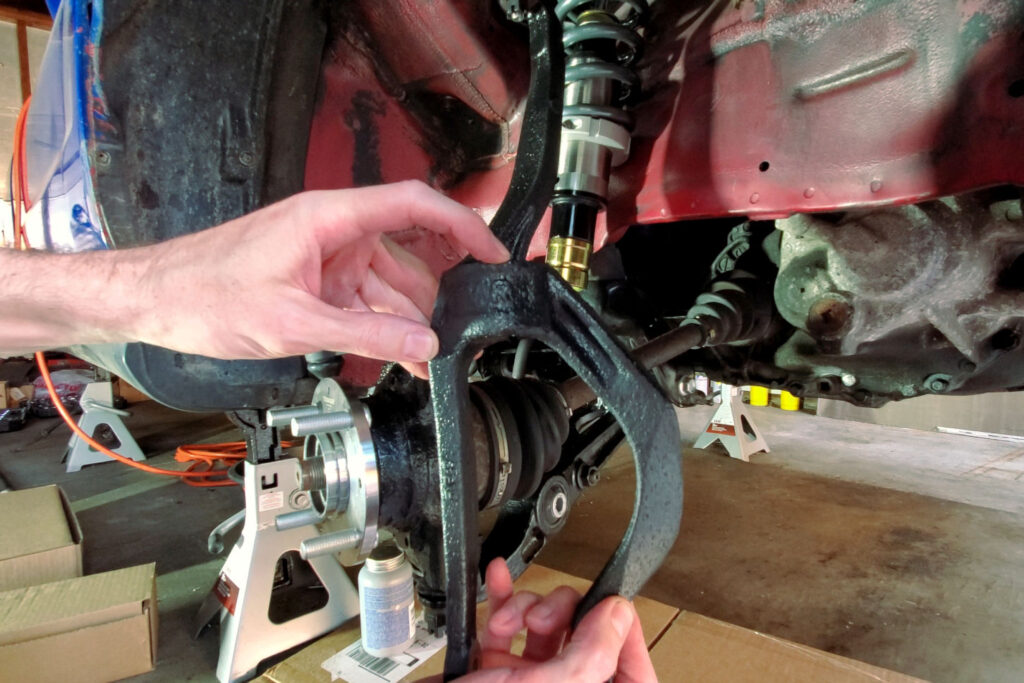
The forks have markings cast into them in case you forget which side they go on.

Lining up the holes with the bushing is the trickiest part. Much easier to do this first.

I fought with it a bit by hand, but couldn’t get the fork to fully slip onto the damper.

Careful application of a floor jack made it easy to push the fork up until it seated fully.
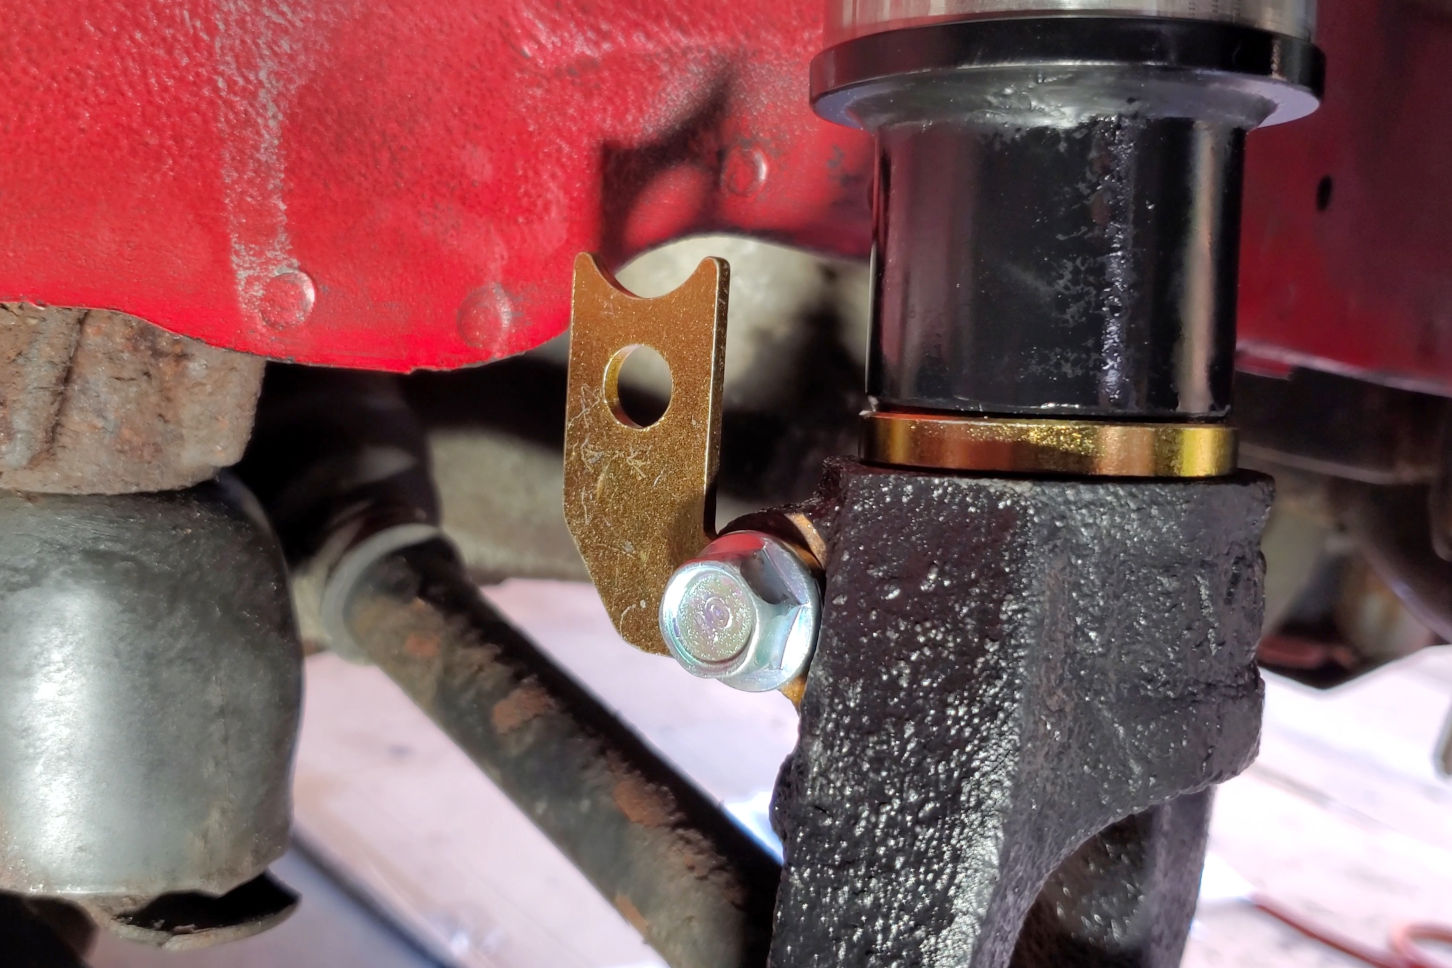
The last step to installing the damper fork is to tighten the pinch bolt. Since the bracket for the brake hose isn’t welded to the shock body like the OEM units, the kit provides a bracket that gets installed with the pinch bolt.

This bracket should be pointing up to properly support the brake hose.
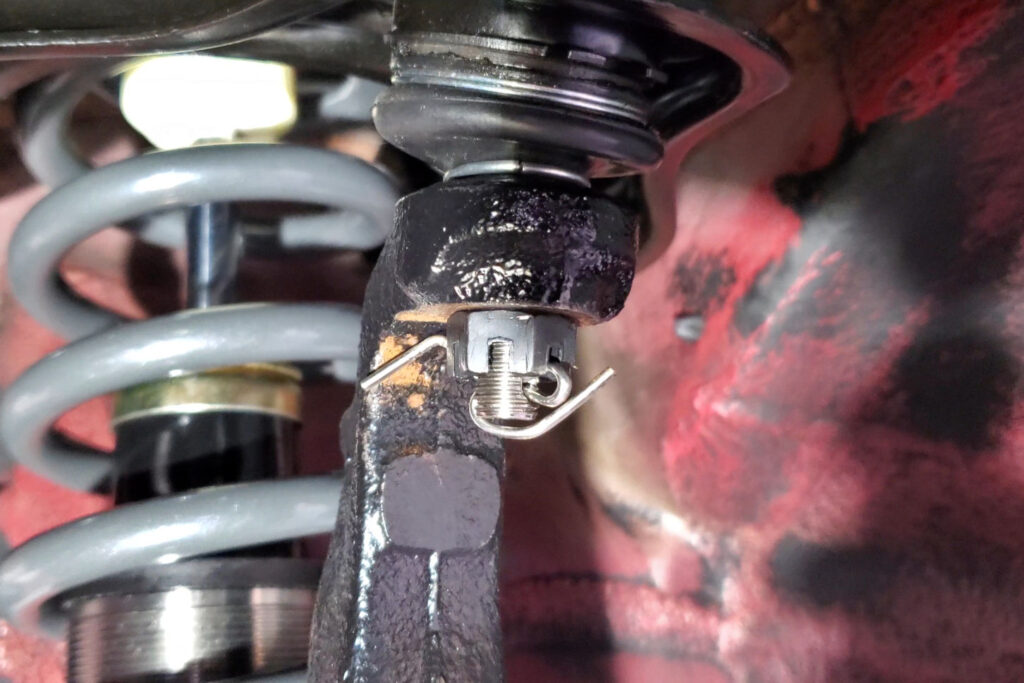
Getting this darned cotter pin installed and bent decently was probably the most difficult part.
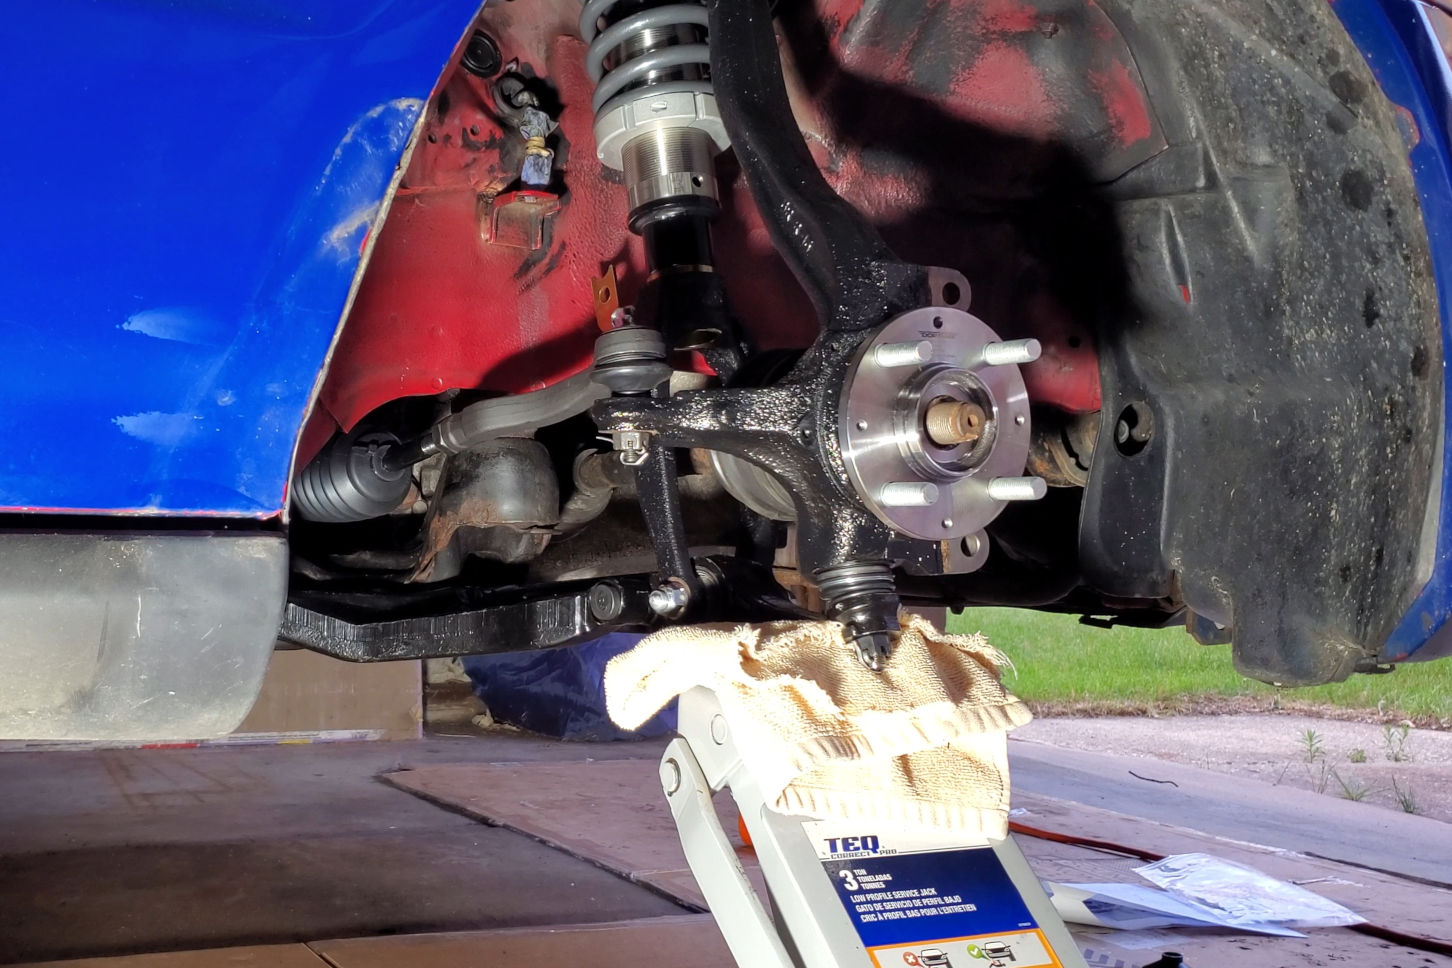
The key to making your suspension bushings last is to tighten and torque all the bolts when the suspension is under load. That means the weight of the vehicle must be on the suspension, so that the control arms will be in their normal position when you tighten the bolts. If you tighten them when the suspension is relaxed, once the car is sitting on its wheels again, all the bushings will be in a constant twisted state. This can reduce the life of your suspension bushings and you’ll be replacing them all over again.
I used a floor jack to lift the assembly until the car just barely came up off the jack stand. I took this a step further later on, sitting the car on its wheels on top of ramps to do the final torque of the other suspension components.

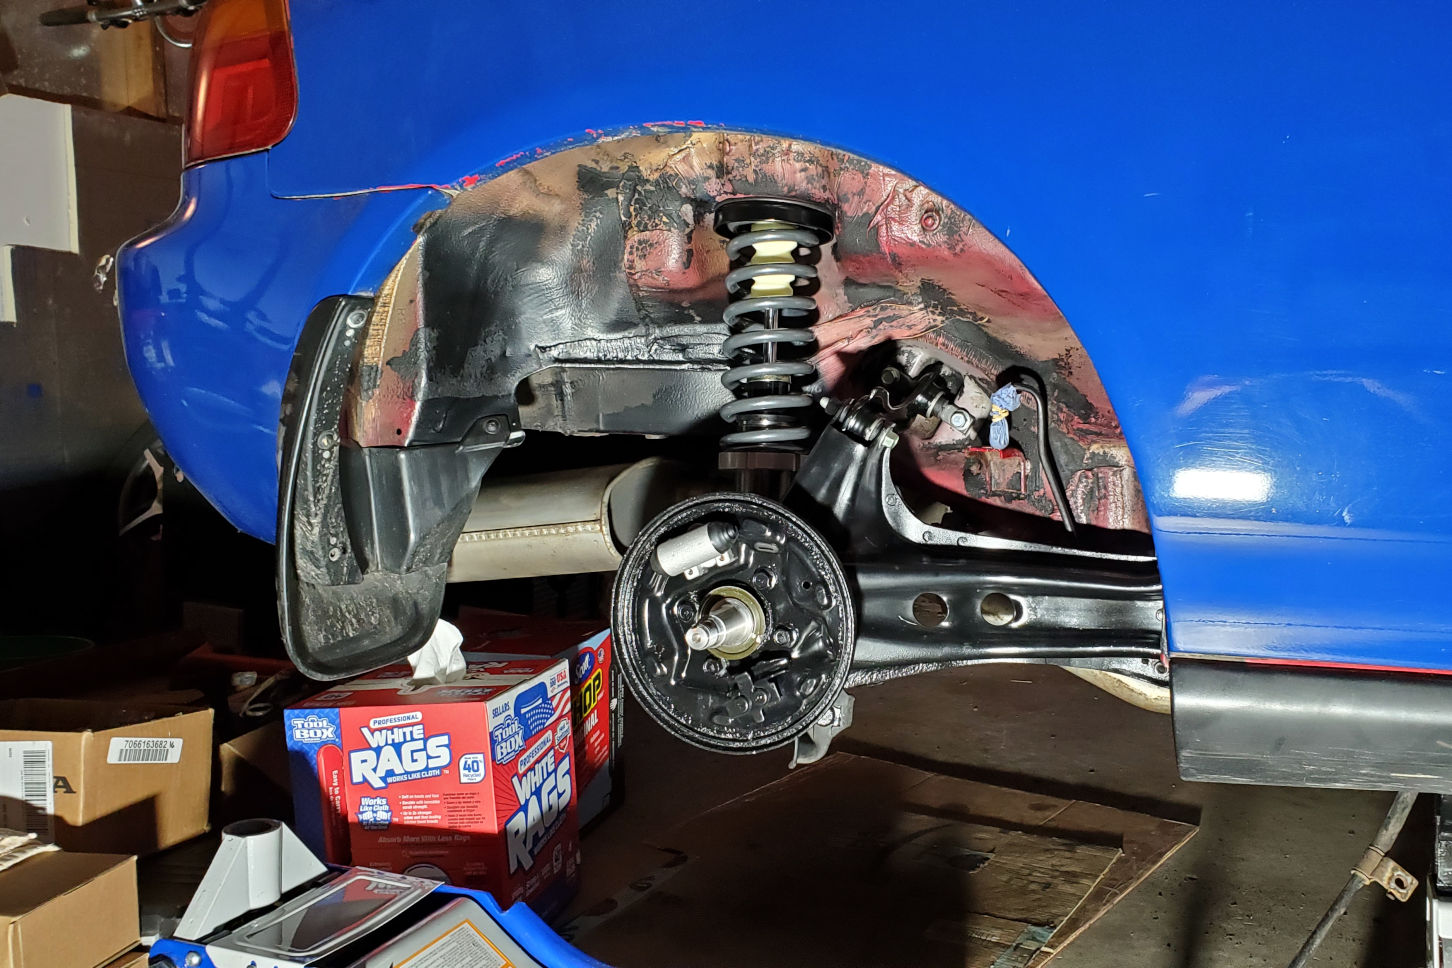
Suspension Refresh Complete
Finally I was done putting all these new parts in the car. All the rusty bits were gone, replaced by new, shiny parts or repainted original components. I even had coilovers for the first time in my life. I was excited to see what it would look and feel like. But before I could get this car back on the ground and take in that glorious lowered stance, I had some new brakes and new wheels to install.
Image Gallery