Sometimes you have to break something before you can fix it.
Few projects encapsulate both immense frustration and eventual satisfaction like taking apart something very old and rusty and replacing it entirely with brand new stuff. My del Sol needed a full replacement of all the suspension components, as most of the metal was corroded and most of the rubber bushings were dry and cracked. Since Honda Civics of that era were so common and are still very popular, nearly all of these parts were available brand new, with bushings pre-installed, and for a relatively low price.
And so I launched into the largest job I had ever attempted on any car, expecting some difficulty, of course, but mostly thinking it would be totally possible to do in a couple weekends with basic hand tools and without spending too much money.
After all, Hondas are easy to work on, right?
Initial Success
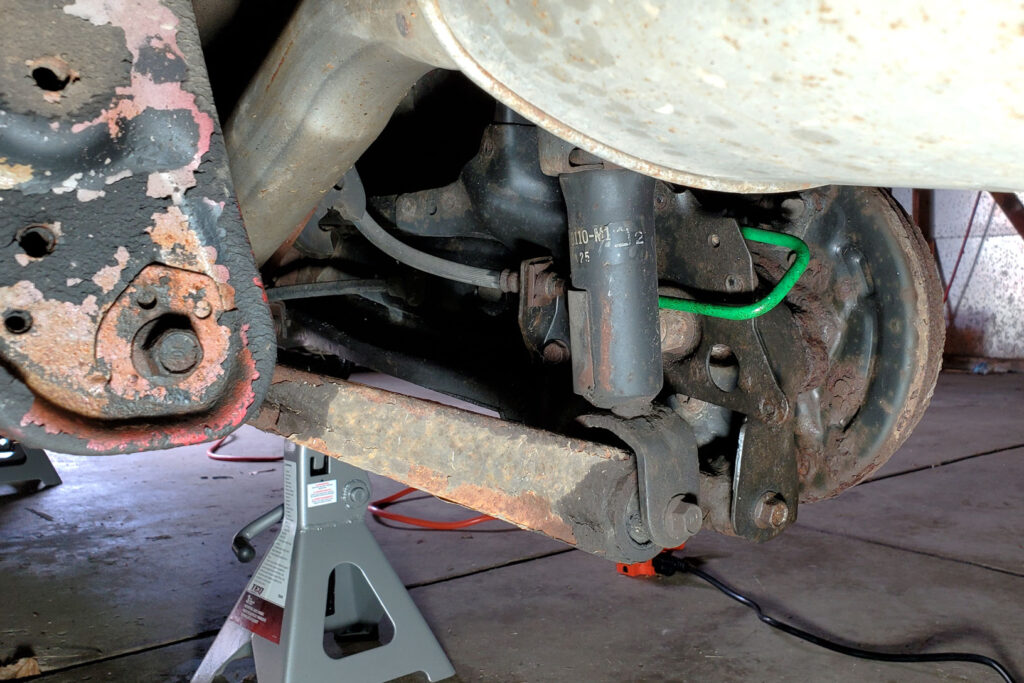
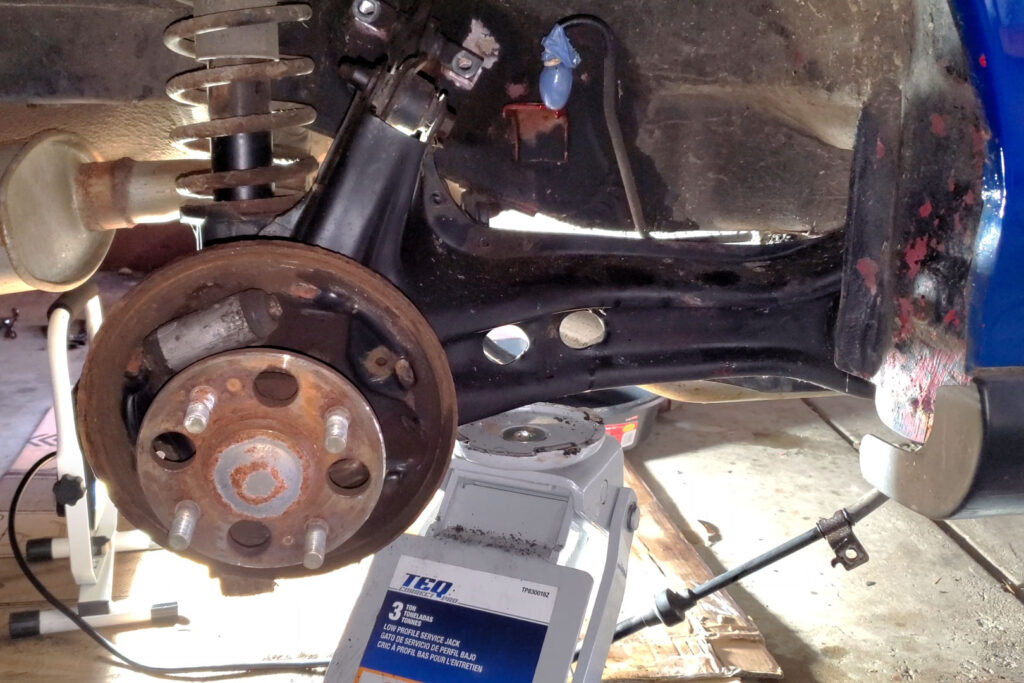
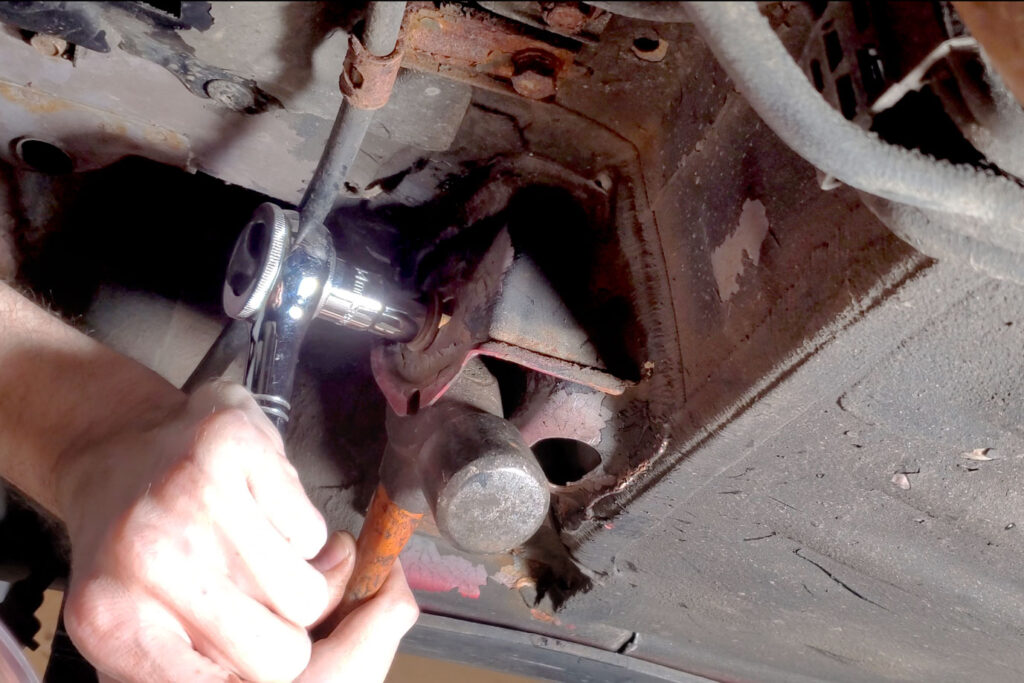
I sprayed every nut and bolt with penetrating oil and let it sit overnight before starting disassembly of the rear trailing arms. The brake hoses came off easily enough, despite the corrosion on the fittings. Since I had no impact driver at this time, I began attacking the old suspension bolts with a simple ratchet and socket set, along with the occasional breaker bar. I actually didn’t encounter much resistance as I disconnected the control arms on the passenger side. Eventually I had it all loose and, using a floor jack, lowered the trailing arm out of the car. It was a lot of wrench-turning, but I was feeling confident.
A Chain Reaction of Things Going Wrong
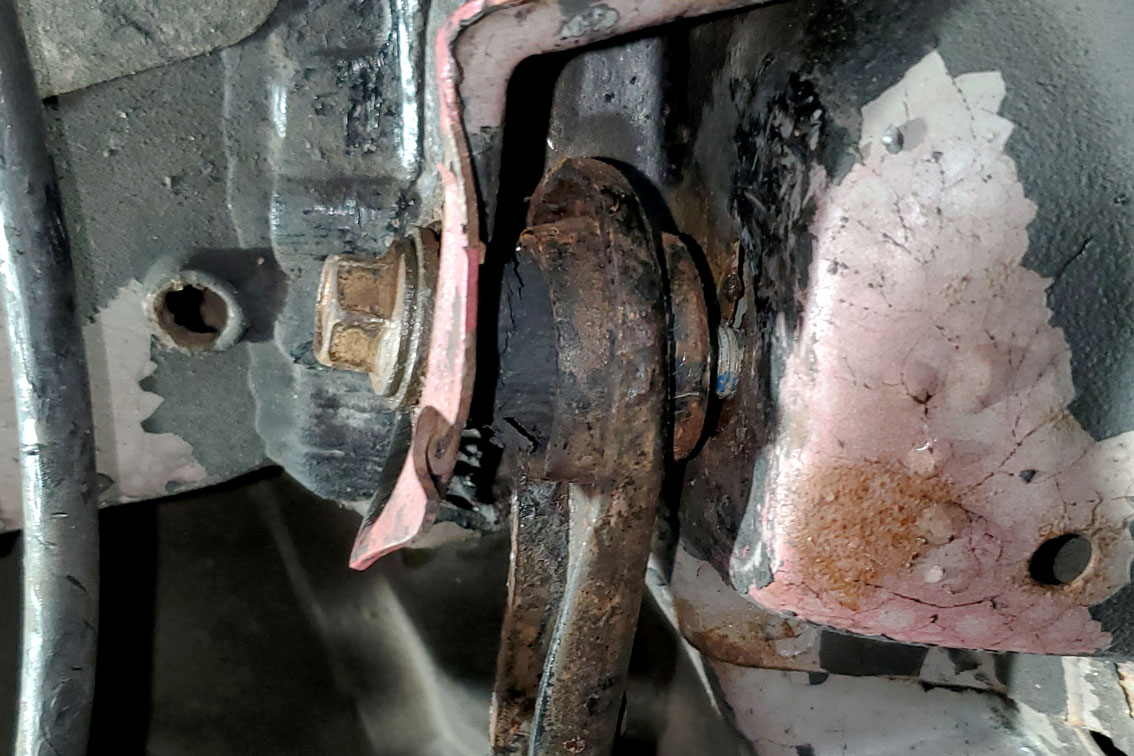
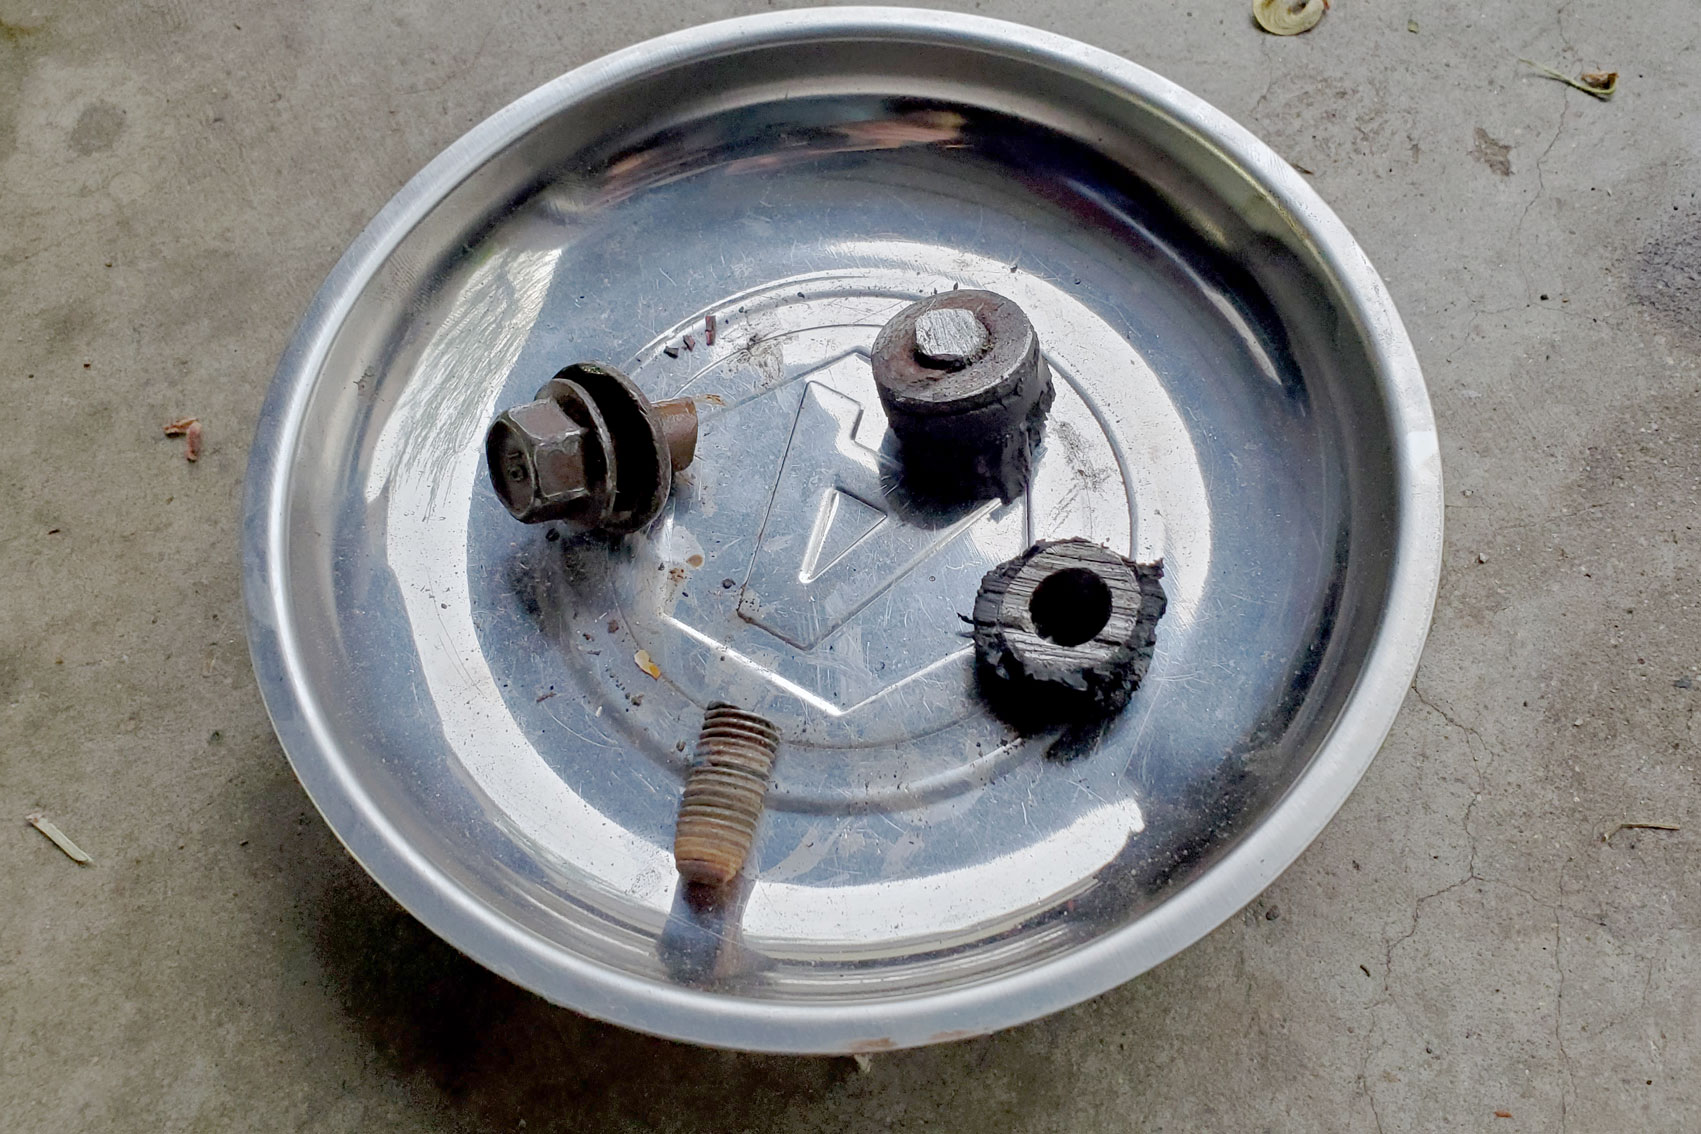
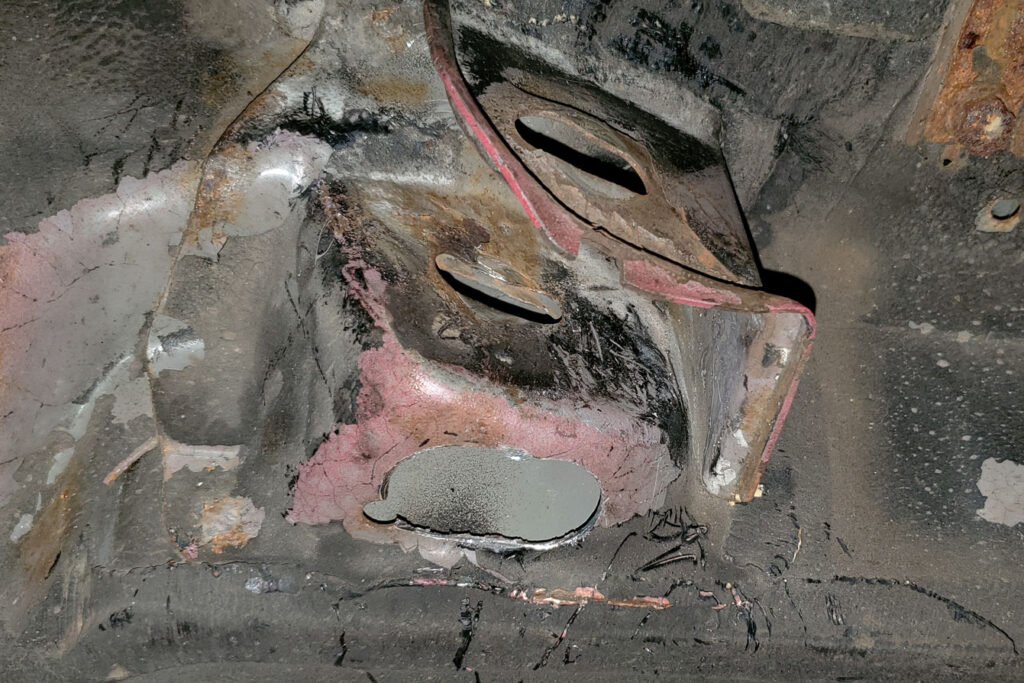
On the driver’s side, things were also going well until I got to the inner toe adjustment bolt at the front of the trailing arm. I was turning this thing for a while, wondering why it wasn’t coming out, until I realized that the bolt had become seized in the metal collar of the bushing that it runs through. All I was doing was twisting the rubber bushing out of its shell. Actually, that wasn’t all I was doing because, as the bushing gradually got pulled out of the arm, the bushing-plus-bolt assembly was getting longer, therefore pushing outward against the chassis on either side of the arm. The bracket that the bolt slotted through got bent backward and bulged out, while the cup-shaped area that housed the threaded toe adjustment nut caved inward. Not only was I not getting this bolt out, I was deforming important parts of the car.

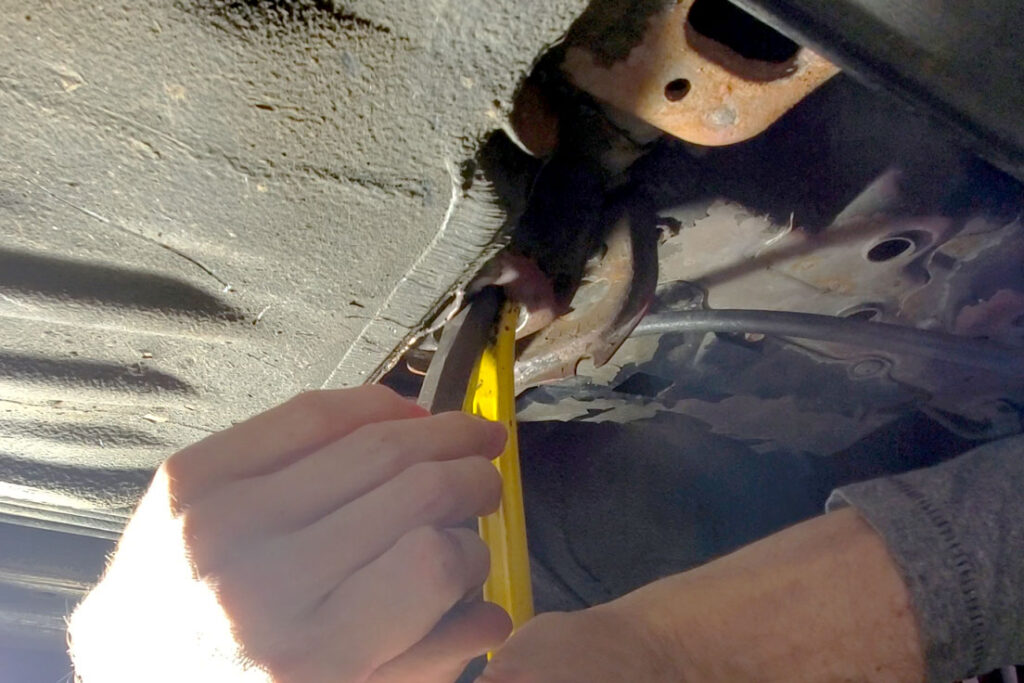
I’m not sure if an impact driver would have been able to break this bolt loose from its collar, but I didn’t have one anyway and now it was too late; at this point the rubber was separated and the bushing would only spin no matter what I tried. I was in too far to put the car back together and take it to a shop, so I was just staring at this incredibly stuck bolt in a mangled bushing, wondering how I would ever free it from the car. Cutting it seemed like the only way, and I did not have an angle grinder or a sawzall. But I knew someone who did.

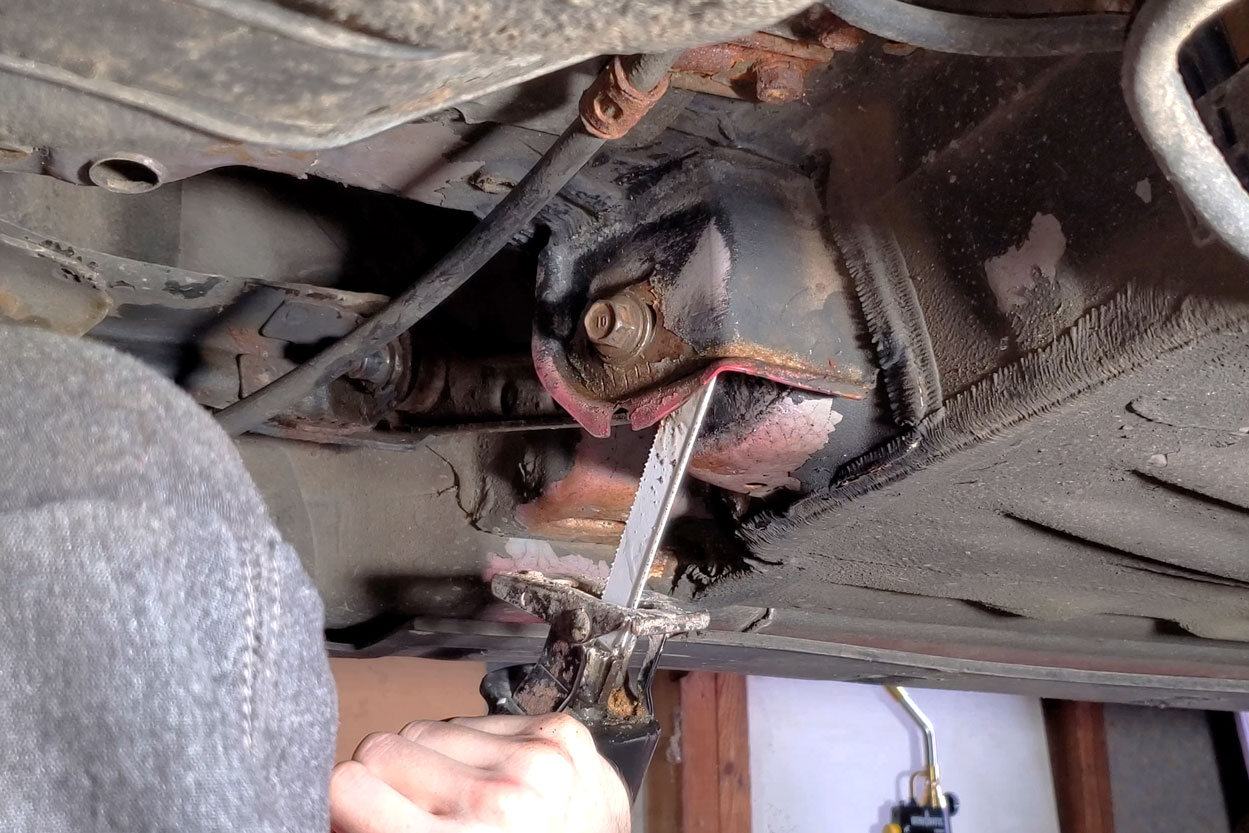
With a borrowed sawzall, some metal cutting blades, and some cutting oil, I laid on my back in a very uncomfortable position under a car that was nearly too low to fit a sawzall and began slowly working through the hardened steel bolt. After a while I had severed it, but then I realized I would also need to cut all the way through the bushing to get both sides free. This took considerably longer, but with patience and some very sore muscles I got through it all and the driver’s side trailing arm was out. Then I just had to pound the head of the bolt out from the back of the remaining fragment of bushing. This wasn’t easy either, due to the limited space.

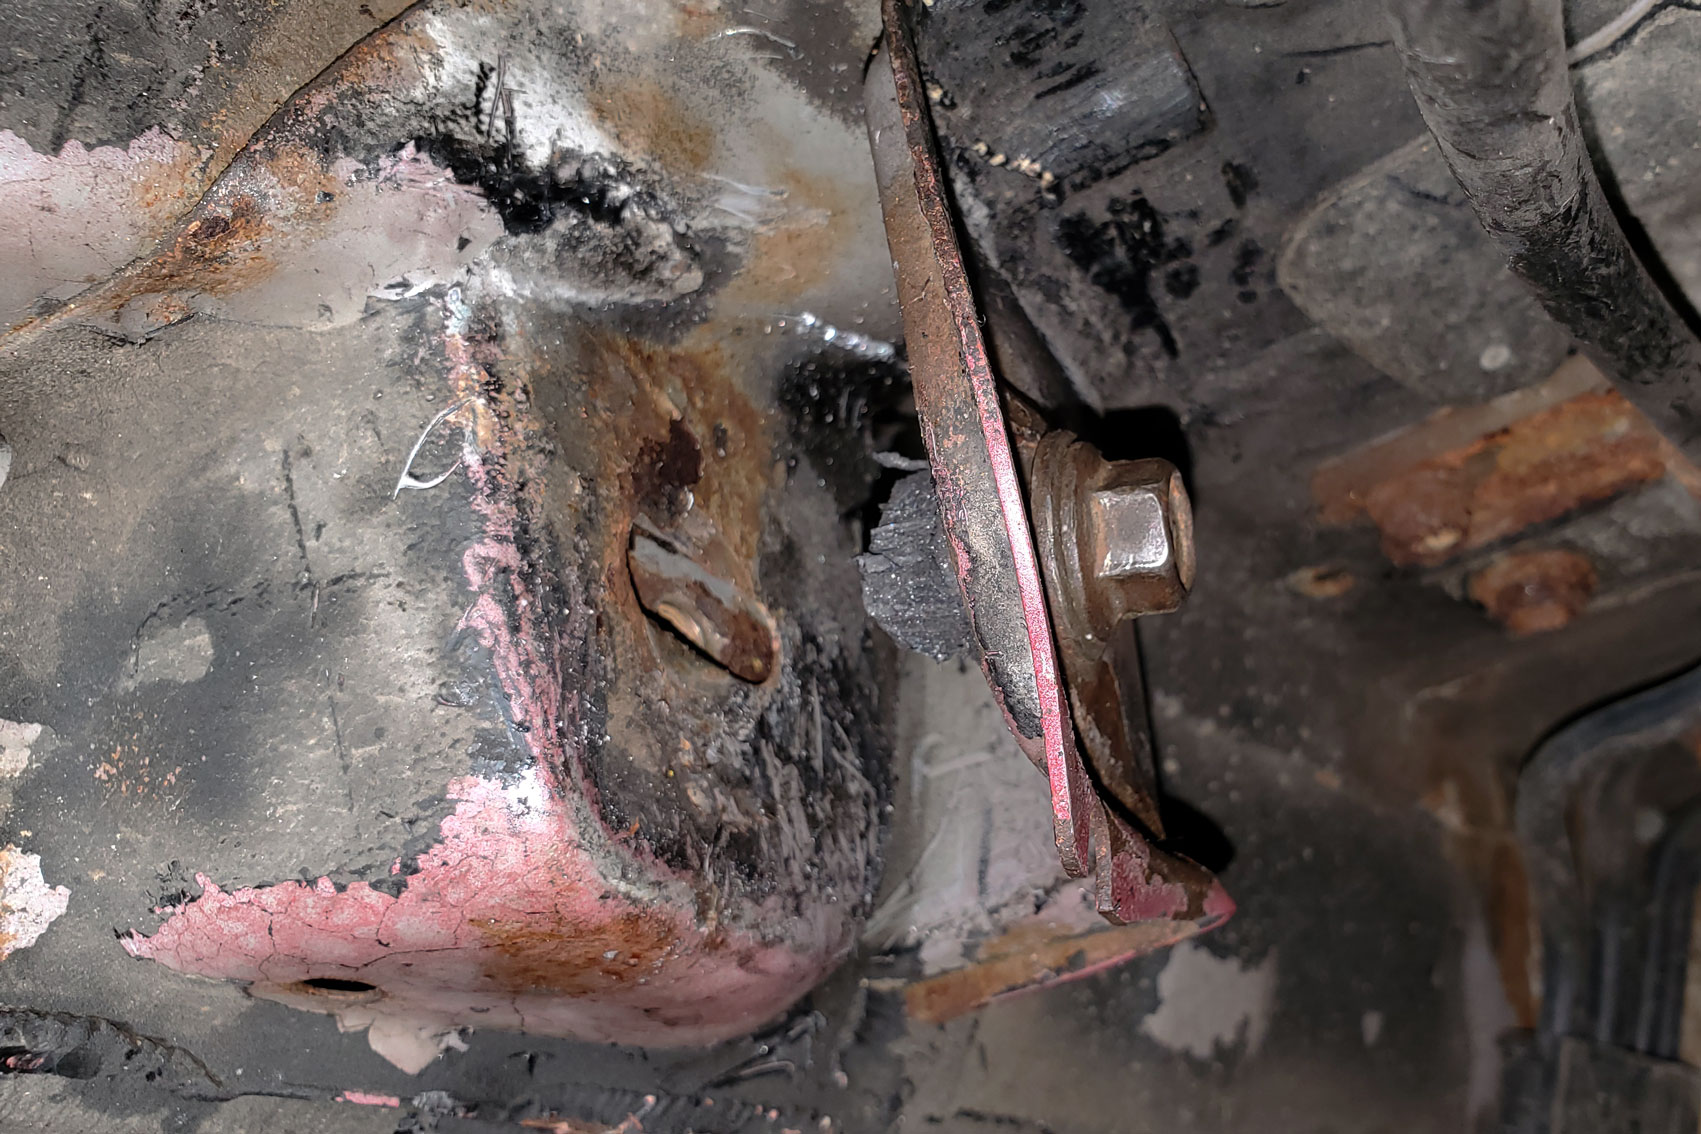
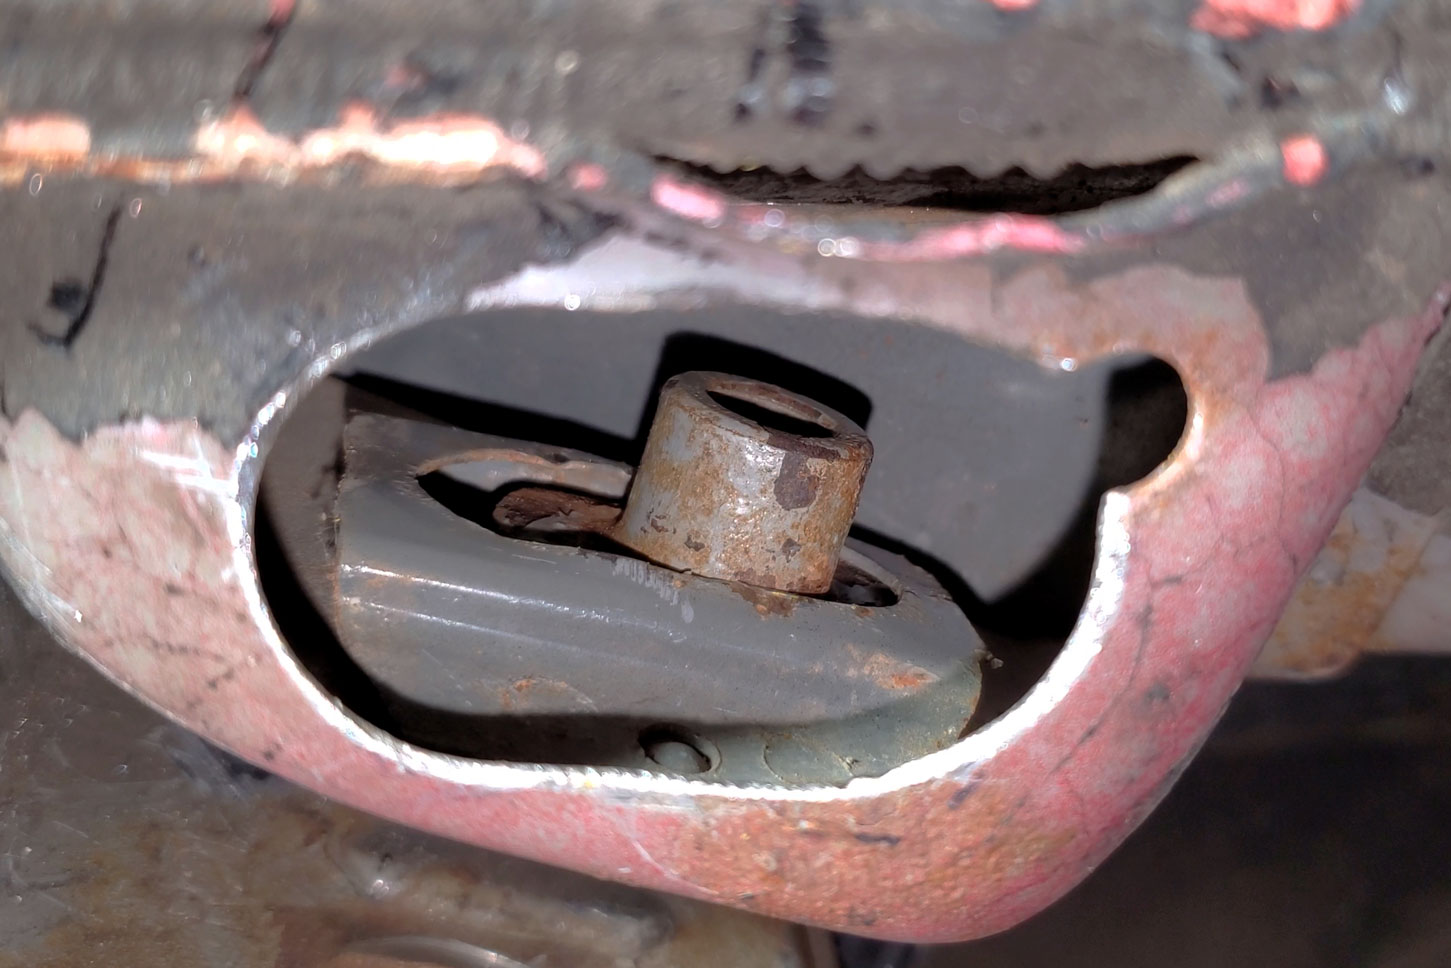
Some time later, as I was comparing the intact passenger side of the chassis to the now-deformed driver’s side, I discovered that the little toe adjustment nut which slides side to side in that cup-shaped area was missing. Since it is meant to be captive and cannot fit through the slot for the bolt, there was only one place it could be: inside the cup.
Back from the hardware store with a newly acquired hole saw, I cut two holes side-by-side in the bottom of the cup. I did it this way to minimize the amount of damage and to preserve the curvature and overall structure of this area. By cutting a couple smaller holes to make an oval-shaped hole, patching this could be done later with a simple flat piece of steel by someone with a welder.
Sure enough, the toe adjustment nut dropped out of the holes I cut. Looking inside, I could see that the track which this nut was meant to be inside of had become deformed during my struggles with the bushing. It was bent just enough that the nut was able to tilt and fall out of it.
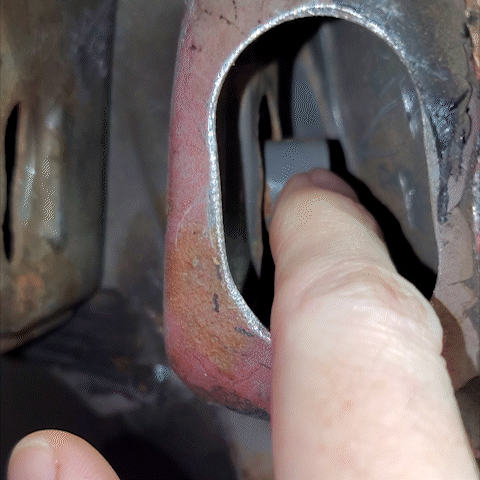
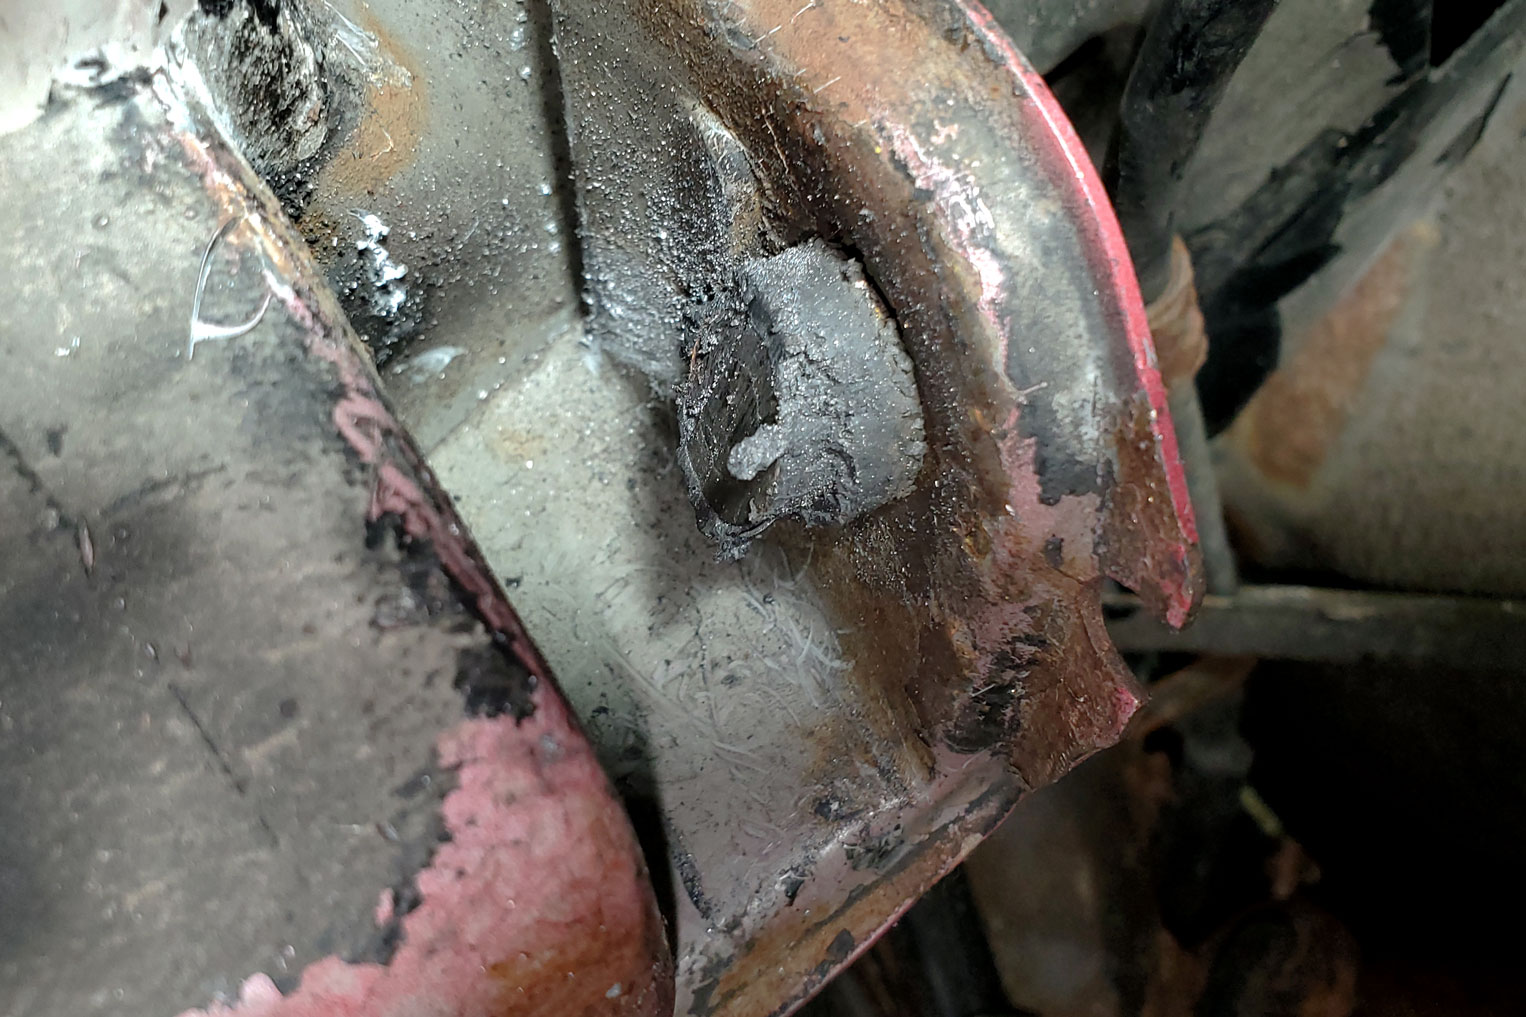
With various narrow pointy tools, hammers, and whatever else I could come up with, I did my best to bend everything back into shape while replacing the toe adjustment nut. Then I shot some spray paint up into the hole to cover up any bare metal I had created while cutting things to bits.

Commence the Expense
Now I had a pair of trailing arms that I could send off to a shop to get new bushings pressed in (the big one in the middle of the arm), but I also had to order a new bolt. Then I got to thinking, “Actually, a lot of these bolts are old and rusty. I wonder if I can still order all these from Honda?” In fact, I could still order them all from Honda, so I did. It added a lot to the cost of this job, as some bolts were more than ten dollars each, but it was worth it to have all new hardware to replace the old crusty stuff. So, with the exception of one or two things, I ordered new nuts and bolts to replace nearly everything on the suspension (and while I was at it, the hardware for the engine mounts as well).

Sometimes You Have to Break it to Fix it
I don’t like cutting things, especially the body or chassis of the car, but sometimes it happens. Thankfully I have not had to do this very often. Even though it’s emotionally (and sometimes physically) painful to cut a hole in a car, the problem can be repaired, you can install new parts, and the next time you have to take it apart it won’t be so difficult.
Image Gallery